There are options to replace the front end of the bike with a rally oriented tower, mostly to add space for compass, log, GPS and everything you could imagine bolting to the front of the bike. Those are not cheap, but they are very versatile. And might be worth considering if you have wrecked the original front-end in a crash or had one of the front-end post break (very rare).
All these towers are removing the original headlights and replacing them with new lights. This removal is detected by the bike, and the instrument cluster will throw an “HLU Failure error” as well as disabling the high beam indicator. Only the Aurora provides an electronic doohickey to properly inject itself in the CANBus for a seamless integration. Note that US Spec turn signals will not fit behind any of those masks, EU ones might as they are smaller, but none are visible on promo pictures.
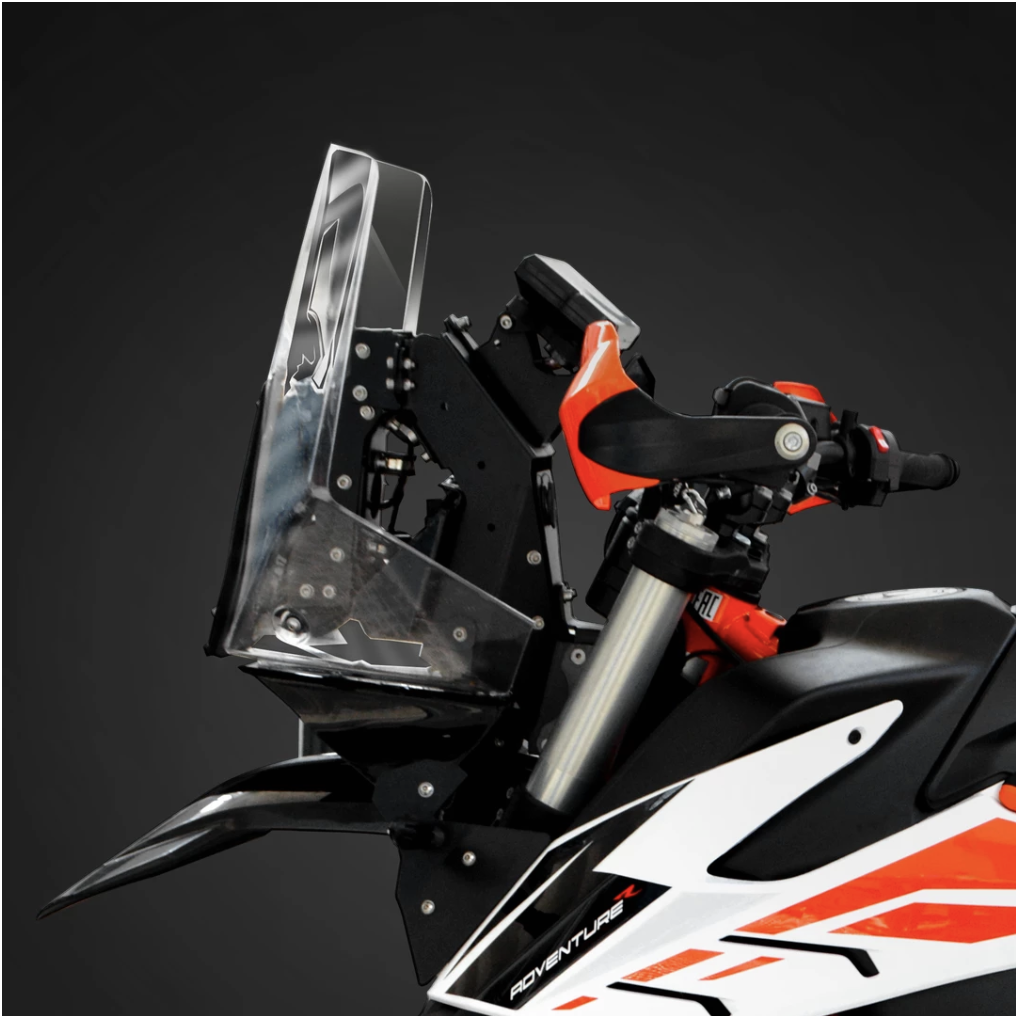
Aurora Rally (€2140) made a very well finished product, with a bunch of possible options to finish it off, and even the possibility of relocating the instrument cluster on the handlebar.
Aurora Rally tower
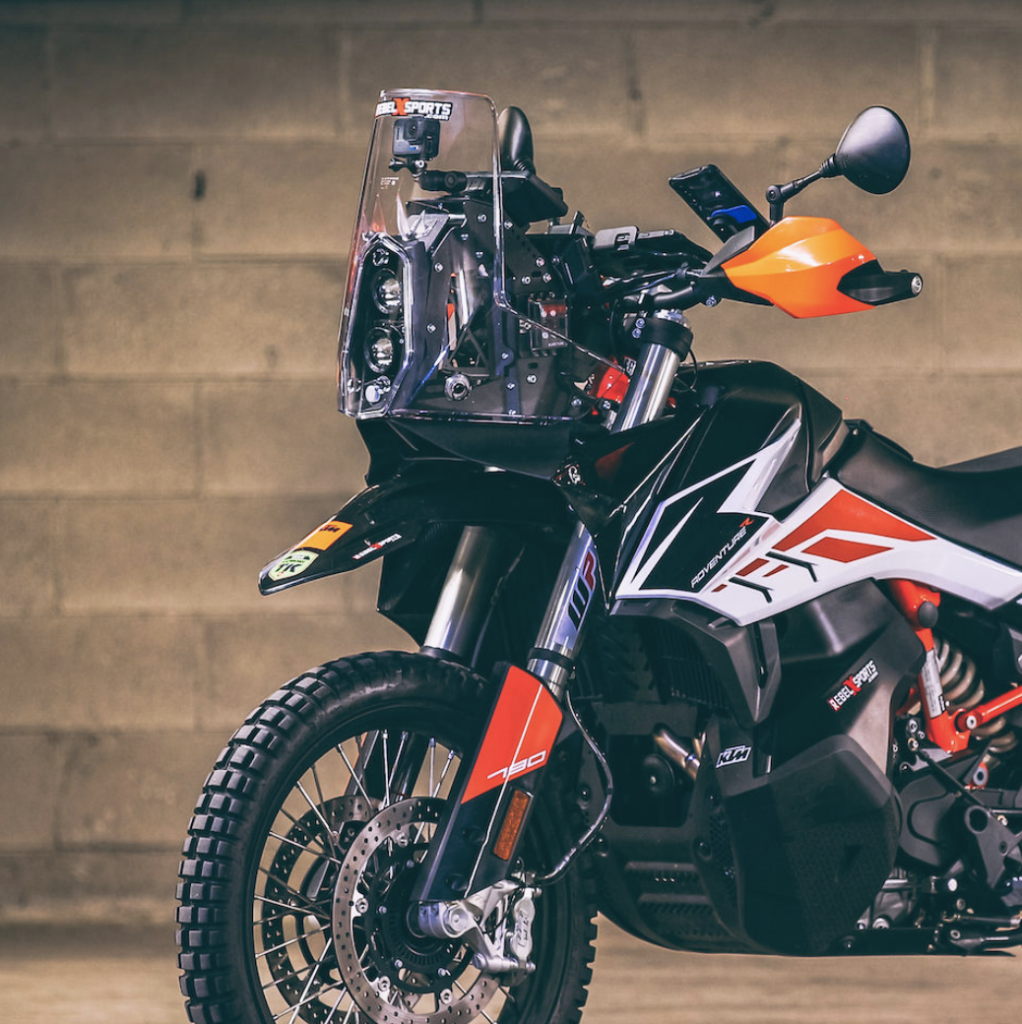
Rebel X-Sport (€2800 direct or $2950 from Rotweiller performance) replaces the whole front end, with new lights, new supports, everything. See the video to see how involved the install is.
Rebel X-Sport tower
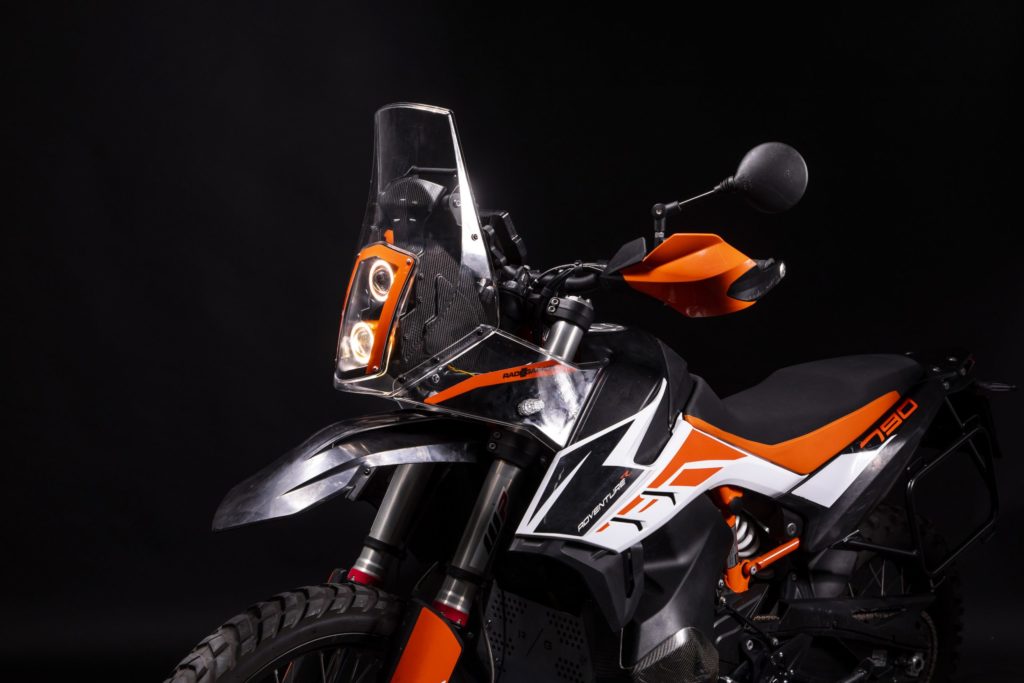
Another vendor is MST SpecialThings (€1230), with a similar tower, Hella lights and space to put quite a lot of hardware.
MST Tower
And Finally Rade/Garage is also offering a rally tower (€1390).
There has been a few clutch failures, at fairly low mileage, and the people affected have been quite vocal as very few of the failures have been covered by KTM. The numbers of failures is however very very low. Since I wrote this article, in November 2019, the number of clutch failures stayed really low. There were 6 known at that point, and this number didn’t even doubled since then. At this point this is a very rare occurrence. I’ll update this article if I receive more updates.
Reports of failures
The main post triggering the attention to the issue was Quintin Mclaughlin’s report: he had only just run the bike in and had the initial service before setting off on a road trip through France, Spain and Portugal. Clutch failed at only 2,000 miles (3200kms).
On the comments on this FB post there are other report of failures: Uli Schildt picked up his bike in Arizona and rode 3,000 miles back to Washington State. A week later his clutch failed.
JP De Villiers, still on the same FB post, writes, “After my first clutch burnt and the fault was put on me after only 2700 km. I put a [heavy duty] Rekluse torque drive with the hope it will be a stronger replacement. It took exactly 300 km, clutch started taking high and slipping exactly like before.”
Those were simple failures, where replacing the clutch plates and the spring was enough to go back on. Unfortunately some riders experienced more catastrophic failures requiring a 3k “rebuild of the engine”. Bill Cairns was the first one, but Yevhen Karel described a similar failure on this FB post : “the clutch plates were burnt, broken into pieces. Then clutch powder blocked the oil filter, oil pump, etc. and the oil could not circulate as it should (the oil could not be seen in the check window). As a result, some oil has been found in the exhaust. Now the engine needs to be rebuilt, cleaned and new clutch to be installed”.
There is another report from Mark Ferbrache’s of a failure at 9000 kms, still on the same long FB post. But in this case note that Mark uses the clutch a lot: “[offroad] you’re on the clutch the whole time. Plus if you’re on a really narly climb your going to be on the clutch a lot“. As opposed to a small trial bike, slipping the clutch all the time on a big adventure bike is going to cook it in no time.
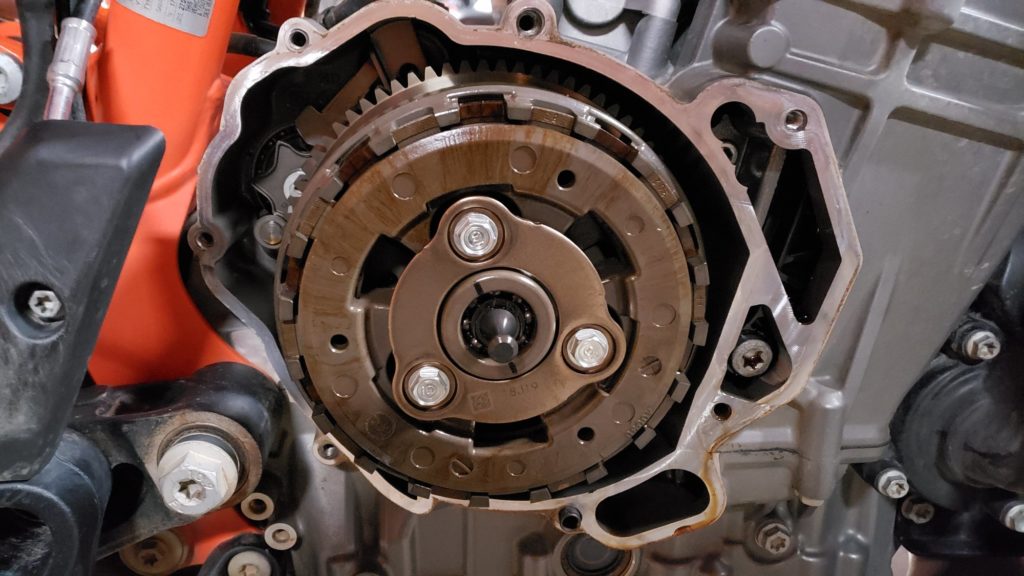
Alarmed by the news of clutches failing, windblown101 decided to open his, just to check, and found it in working order. He still changed the springs as they were slightly out of spec. So here you go, pics of a good clutch.
I leave the last word on this to gearheadE30: “Clutch failures (unconfirmed). Probably similar to range of experiences people had with 950/990 clutches. From what I have seen, most of these failures have been from abuse. I have only seen one that actually looked like a surprise failure, which appeared to be due to insufficient oil flow. The outermost clutch few clutch plates and fibers didn’t seem to be cooling adequately and showed obvious signs of heat. Seems to be fairly uncommon but we may see that the “meoni clutch mod” from the 950/990 becomes a popular change. One also looked like clearance between the input shaft shaft ID and the clutch release “tension bolt” part number 63532048104 was maybe too tight and not letting oil through to lube the clutch…but that was just from looking at wear patterns in pictures so it is hard to say. I’m calling this an open question, but it’s worth saying that the clutches held up great in Morocco and the only problems we had were due to unusual abuse“.
What we know about the clutch
The clutch on the 790 is a wet design, but instead of just dipping in the oil a feed is also injected via a jet in the center of the clutch shaft. This jet is on the worklist of recommended work to be performed at every service (See the Service manual, page 414). Note that this is not a new system for KTM, the same overall design has been present on older models like the 950.
Some believe that those failures are due to the jet being blocked by debris in the oil, preventing lubrication of the plates and causing an early failure of the clutch. A KTM dealer even diagnosed it as such. There are suggestions to increase the jet size, and/or drilling holes in the basket, but those are not proven to actually work (The fact that it worked on the 950 16 years ago, doesn’t make it the panacea for a brand new bike). Plus increased oil flow will make finding neutral more difficult.
See also this post with good information about pressure and the size of the hole.
Recommendations
The #1 recommendation is if you feel the clutch slipping, stop ASAP. From first sign of slippage to unusable bike seems to happen in a very short time.
Check the freeplay. Often. Lack of freeplay at the lever will cook a clutch fairly quickly: make sure to control it (procedure is in the manual). For those using a CamelADV extender, to keep the same freeplay on the clutch you need to make the freeplay on the lever a little longer.
Finally when the traction control intervenes and leads to the engine bogging down it’s important not to slip the clutch to raise revs, instead you should leave MTC to do its job.
Wear item
The clutch is a wear item. As such, like brake pads or tires, those failures are not covered by any guarantees, including the KTM one. For this reason none of the failures above were covered, to the dismay of the owners.
Some believe there is a technical issue with the bike causing the early failures, and if it is the case, the clutch should be changed free of charge, along with the cleanup job to remove bits of clutch material from all the oil passages.
Acknowledgment
I was kicked into gear into writing this article thanks to Tim Cullis. He posted another great post on an UK forum, which served as the original base for this article.
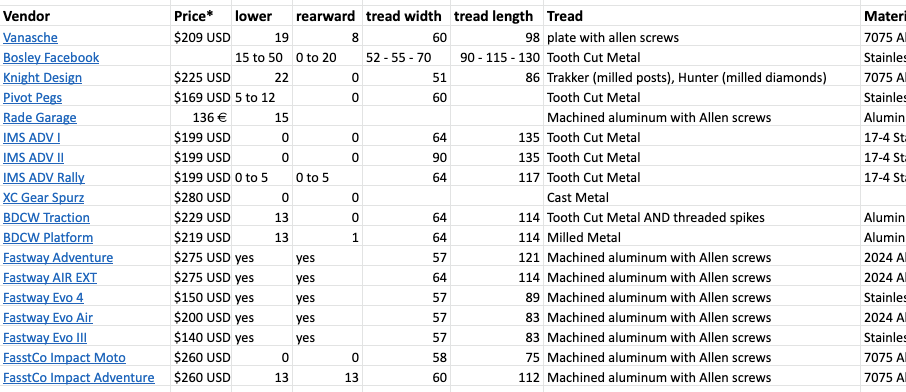
There are a lot of potential replacement footpegs you can use on the 790 Adventure. Bigger, lower, moved back, in aluminium or stainless steel, the choices are multiple.
advrider inmate Kubcat collated all the lowered footpegs he could find and put them all in a spreadsheet. Which is now available for you, until we figure out how to format this in a better form. Maybe.
On the R, and only on the R, there are reports of rear shocks failing and needing to be rebuild. It’s hard to figure out hard numbers, but there are a few. Just to be clear the issues are of shock leaking oil, broken seals, not broken shaft or “exploding shock” as you can read online.
There is a theory going around incriminating the catalytic converter: it is really hot, and very close to the shock, so it is possible that it is heating up the oil or the seals, thus causing the failure. Some facts however don’t align very well with this theory:
This failure is only on the R, the S model is not affected at all. If the catalysts were in fact “boiling the oil inside the shock” as I’ve read it in place, there would have been failures of the S shocks as well;
There is at least one example of a failing shock absorber on a bike with the catalyser removed from day one. Ergo, the catalyser in that case was not to blame;
As bikes get more mileage, failure rate should have increased. This is not the case, the bikes with failing shock absorbers are all low mileage (less than 2k, very new).
This seems to indicate that the issue is probably not the catalyser but more likely a default on some shocks with a problem from the factory.
I started a discussion thread about it there to try to gather more facts. Thomas Rosenwirth also recommends cleaning up the seals regularly if you ride off road.
Camel ADV sells a product to protect the shock from the catalyser heat that may help keep the shock working temp to be lower.
There are reports of cold start issues. The engine starts, but stalls right away, requiring multiple tries to start and hold idle.
Before looking at anything else, try following this foolproof start procedure:
Make sure the kill switch is in the neutral position (Better, when you stop the engine with the kill switch, train yourself to always put it back in the neutral position right away);
Put your key in, turn the power on;
Listen to the fuel pump building pressure in the circuit. Wait until it stops. Note that this priming will not happen if the kill switch is engaged. The manual recommend waiting until the instrument panel starts, which takes roughly the same time as the priming;
Don’t touch the throttle;
Tap the start button. Don’t keep it pressed until the engine fires, just give it a tap and the engine will start by itself.
If this doesn’t start the engine every time, or if the engine stalls right away, check your fuel filter for contamination and the pressure at the fuel pump (or ask your dealer to do it). Note: Filters are black when wet, white when dry: don’t assume a dark filter is a dirty one.
It appears also that the fuel quality has an impact on the self learning the bike does. If you usually run with a type of fuel and you switch to something lower or higher octane, it may trigger this multiple start issue.
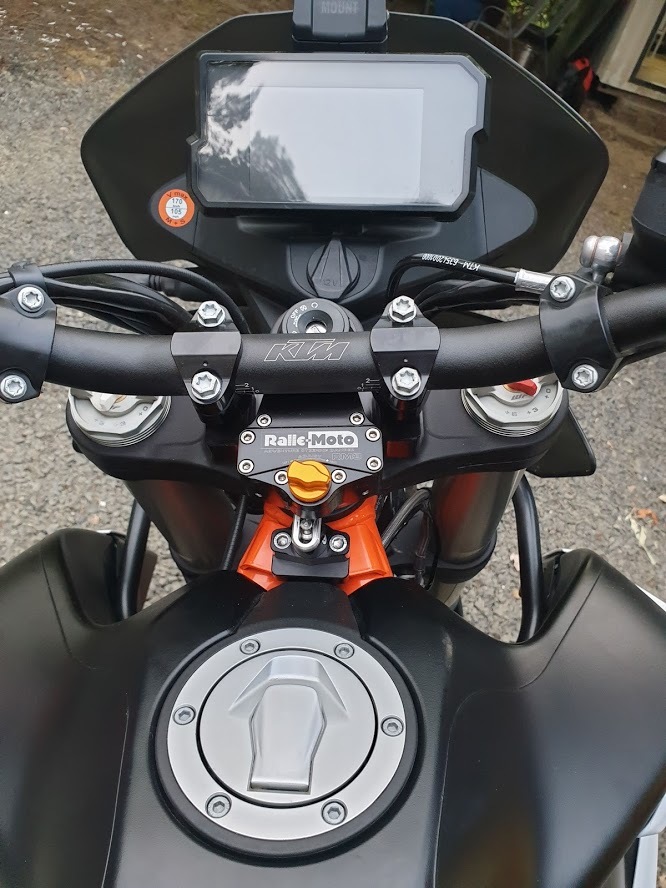
The 790 adventure come standard with a simple steering damper. It’s fine for the road, but for serious off road junkies it is not enough. There are other options out there that allow for more fine tuning (aka, dampening when going away from center, but not the other way, etc). There is a hole with a plastic plug right under the handlebar just for that purpose.
All those dampeners are going under the handlebar, this means that their mounting kits are also raising the handlebar and probably moving it forward at the same time. Keep an eye on handguard, as moving the bar forward may cause them to hit the instrument panel…
Also, if you fit one of those you need to remove the original dampener.
The stock steering damper can be upgraded by changing out the stock lightweight oil for 10 or 15 weight fork oil. There are a few YouTube video showing the process. This make it harder to move the handlebar in all directions. Ok for road usage, probably not ideal off road.
For road only usage, Hyperpro offers a dampener (In multiple colors!) which can be adjusted in resistance as a drop-in replacement.
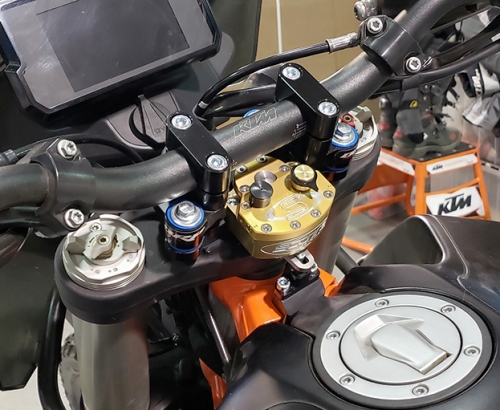
Scott’s damper
The most talked about, and a well proven solution on a number of bikes. With slow and high speed separate circuits, and in business since forever. $660 for the device and a mounting kit specific for the 790. The mounting kit is massive as it also adds rubber damping to the handlebar itself.
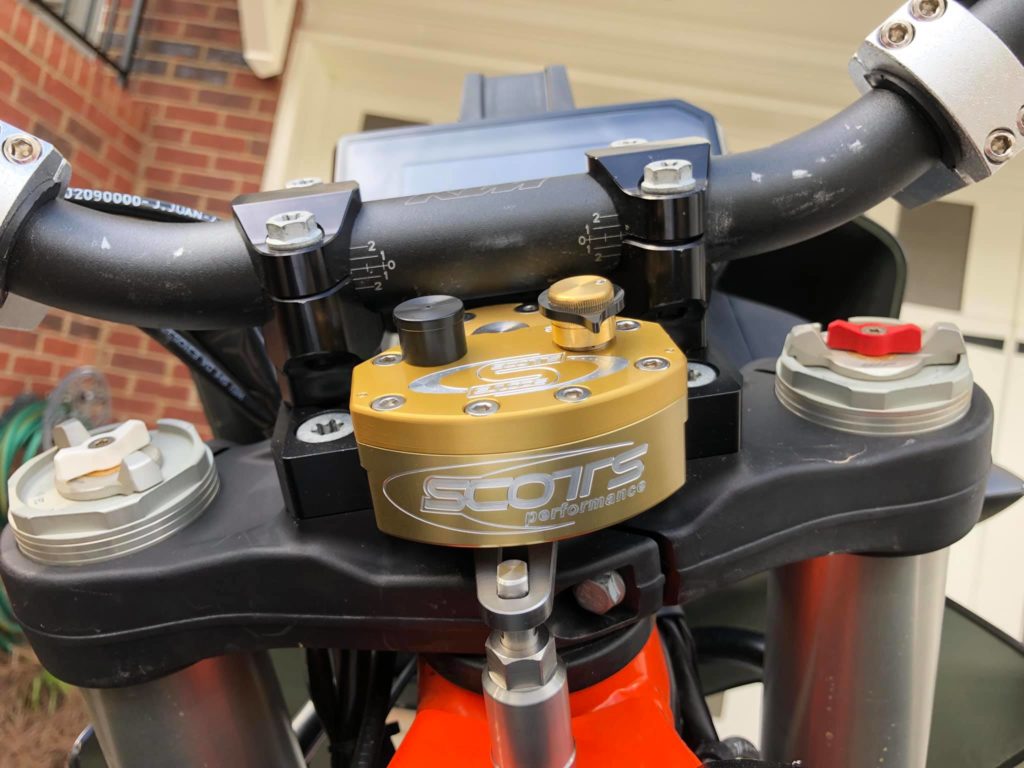
There are two versions of the Scott damper, a road version (with a R stamped on the body) and an off road version. You probably want the off-road version.
Scott’s damper with Scott’s mount
A simpler, lighter and cheaper mount is available from TripleClamp Moto for £160, or £475 with the device in the UK, $170 in the US, and €195 in the EU (prices are indicative, visit the site for exact price).
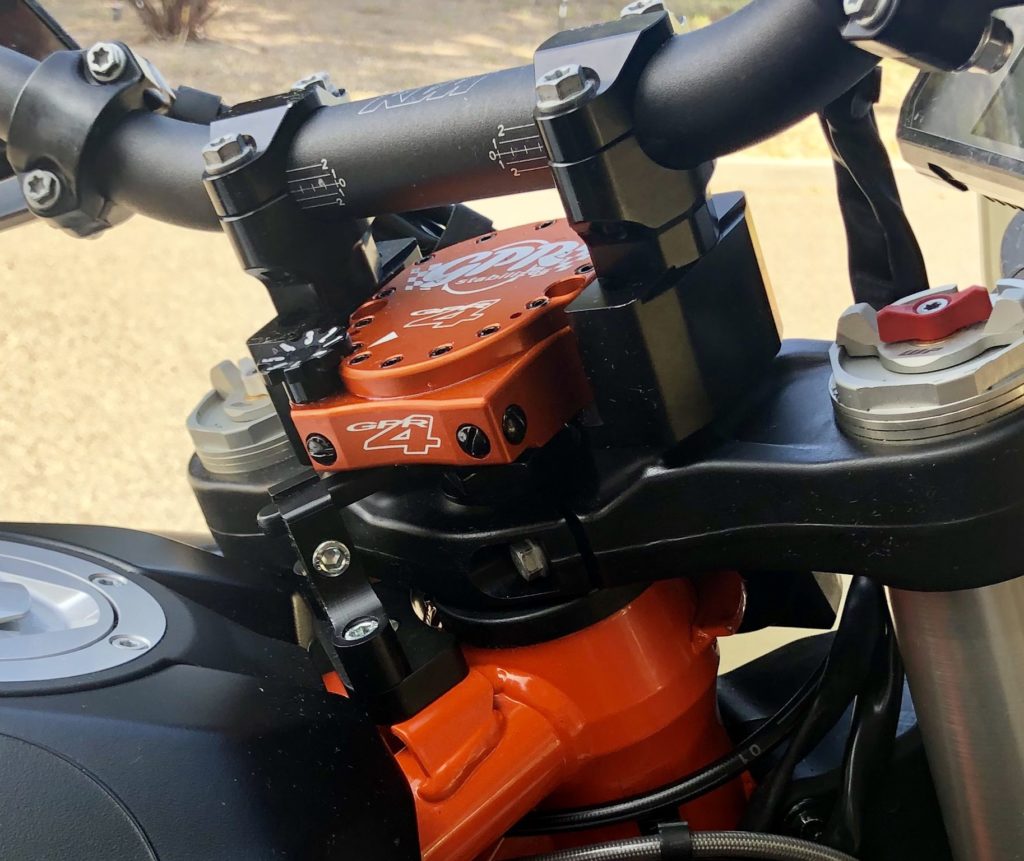
GPR damper
Simpler solution, with only one simple button, this damper will not protect you as well against hitting a rock a speed as it lacks the high speed circuit of the Scott’s. But still, it probably does most of the job, releases when hitting a 15º angle. $525 with mounting kit.
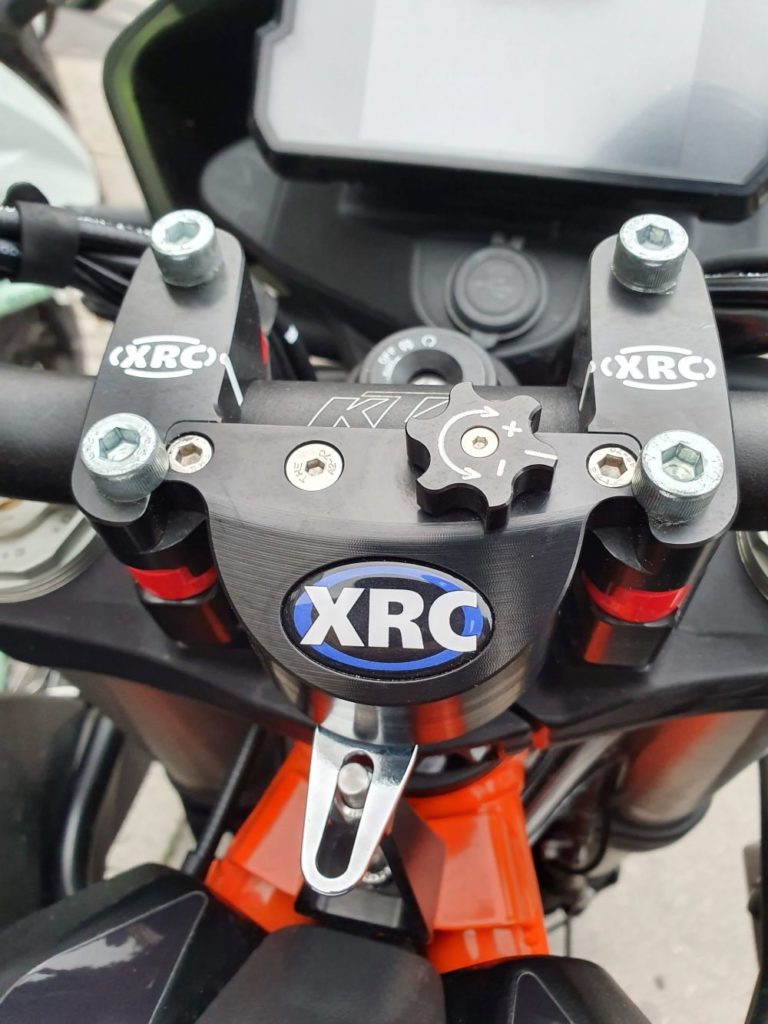
Chris Birch’s own, so you’ve seen this device in multiple videos already. XRC is a NewZealand company. Available online here ($NZD980, aka around $570), ships worldwide (not sure about the post specific to the 790).
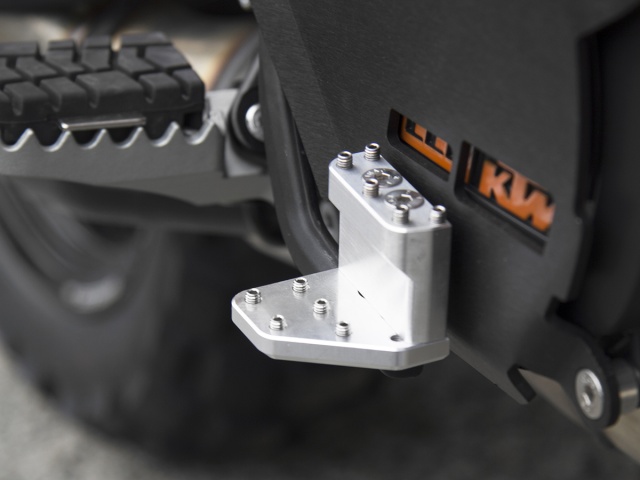
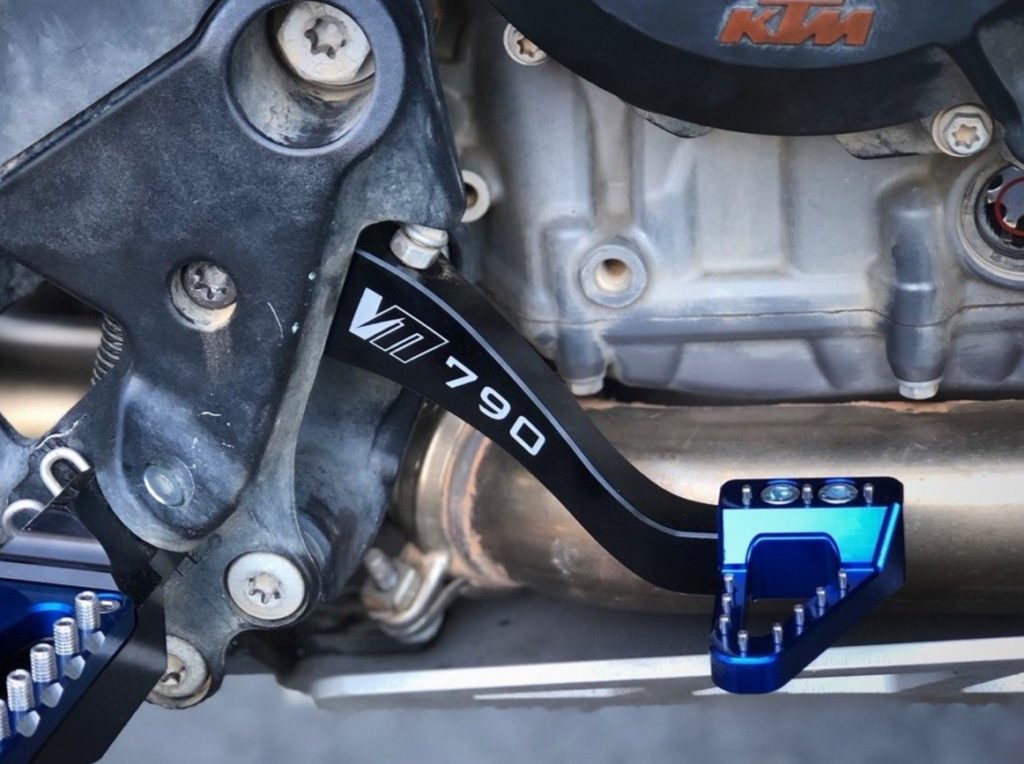
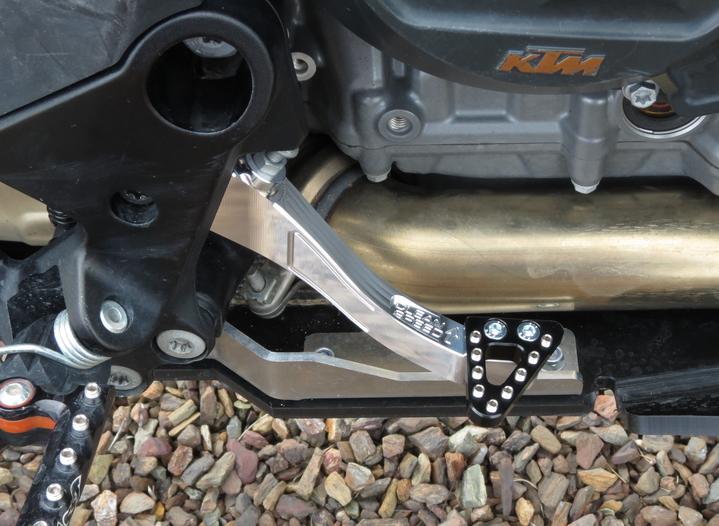
You may have missed it int he manual, but the rnd of the brake pedal is reversible. The way it come from the factory is better if you mostly ride sitting down. On the other hand, if your riding is mostly done standing up on the pegs, you should reverse the brake pedal for better accessibility.
An option to have both modes in one pedal is a part from AltRider ($91) allowing to have two separate platforms next to each other for reachability in all cases.
Vanasche motorsport makes a replacement for the lever and various choices of brake pedal pads to go along with it (lever €126, footpads around €30/€35 depending on style)
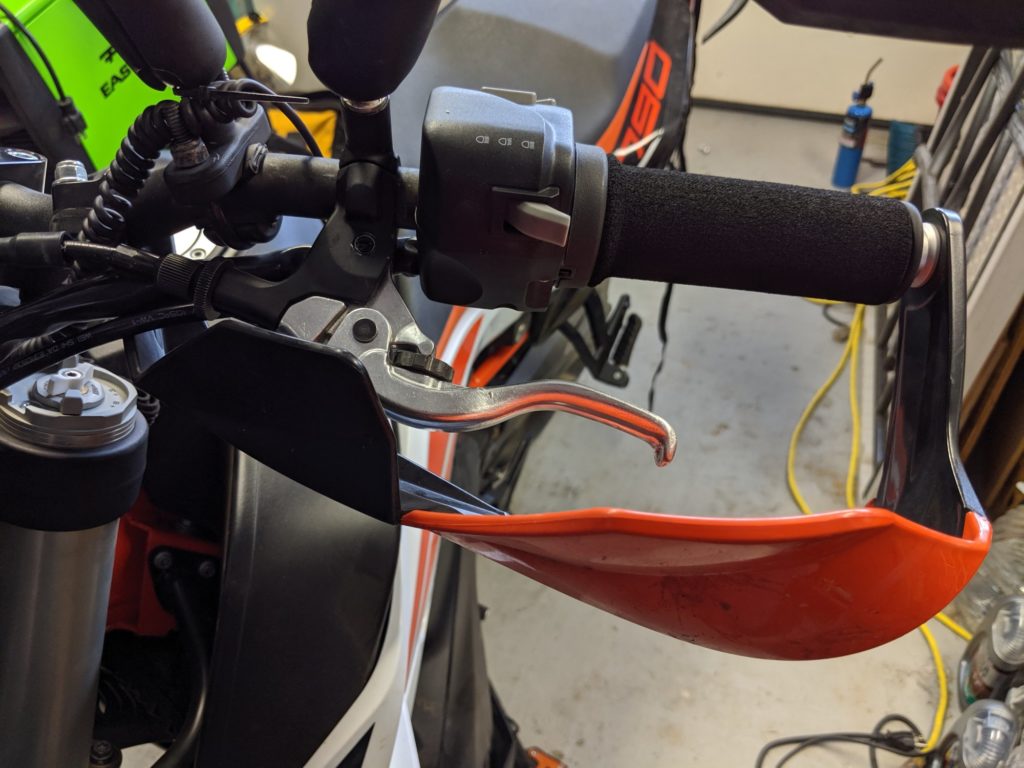
If you’re like me, brake and clutch levers are consumable. KTM clutch (p/n 63502040000, €60) and brake (p/n 63513002044, €55) levers are ok, but better controls do exists.
Some people suffered catastrophic failure of the front brake with a third party lever. Check the fitment of the rod on the lever once installed, there must be freeplay and the rod must rest in the center of the hole.
Warning when installing the levers: the pin holding them are not the same on the right and on the left. On the brake side the pin (p/n 64113006000) screws in the front master cylinder housing and is also locked with a lock nut. On the clutch side the pin (p/n 64102038000) is only retained by lock nut, it doesn’t screw into the body. And yes, the smooth top are just bit of plastic to prevent water pooling inside the hex recess, and those plastic bits are not shown in the part list (don’t lose them!).
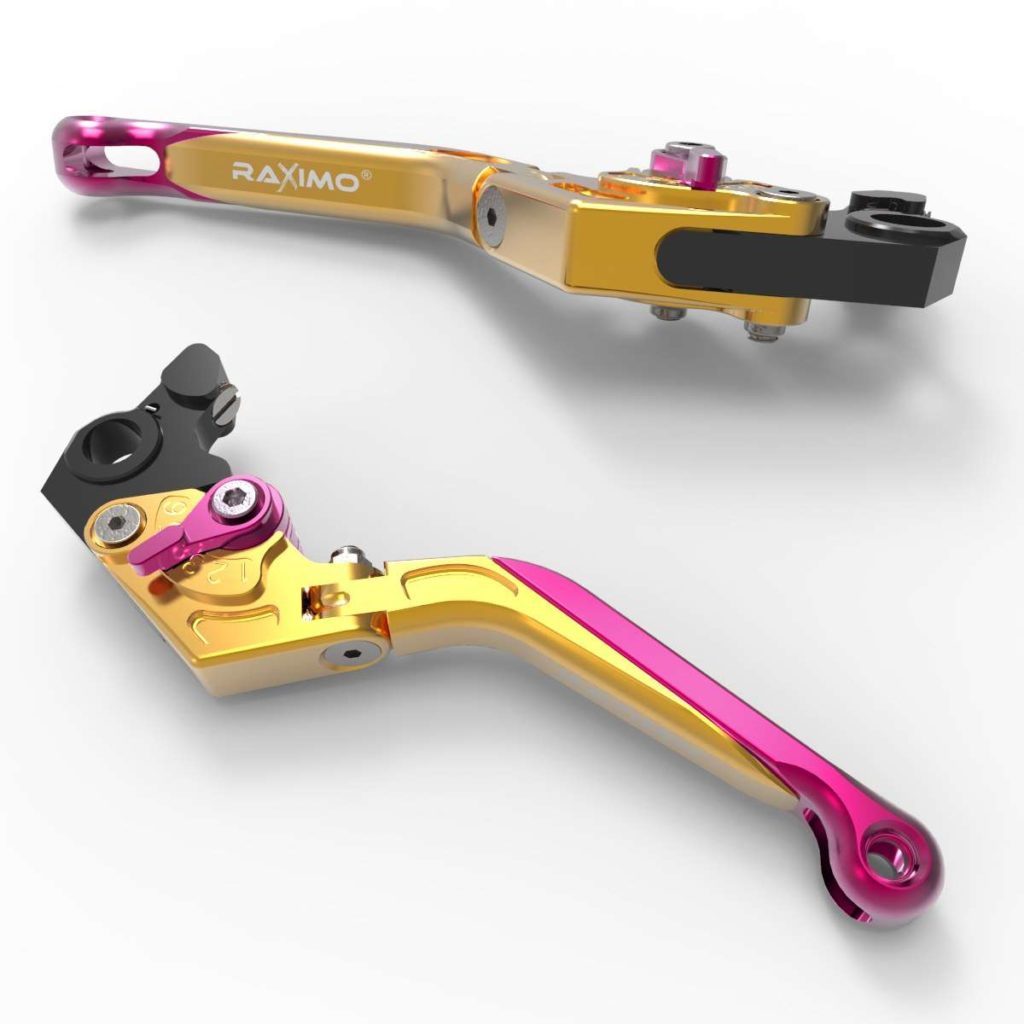
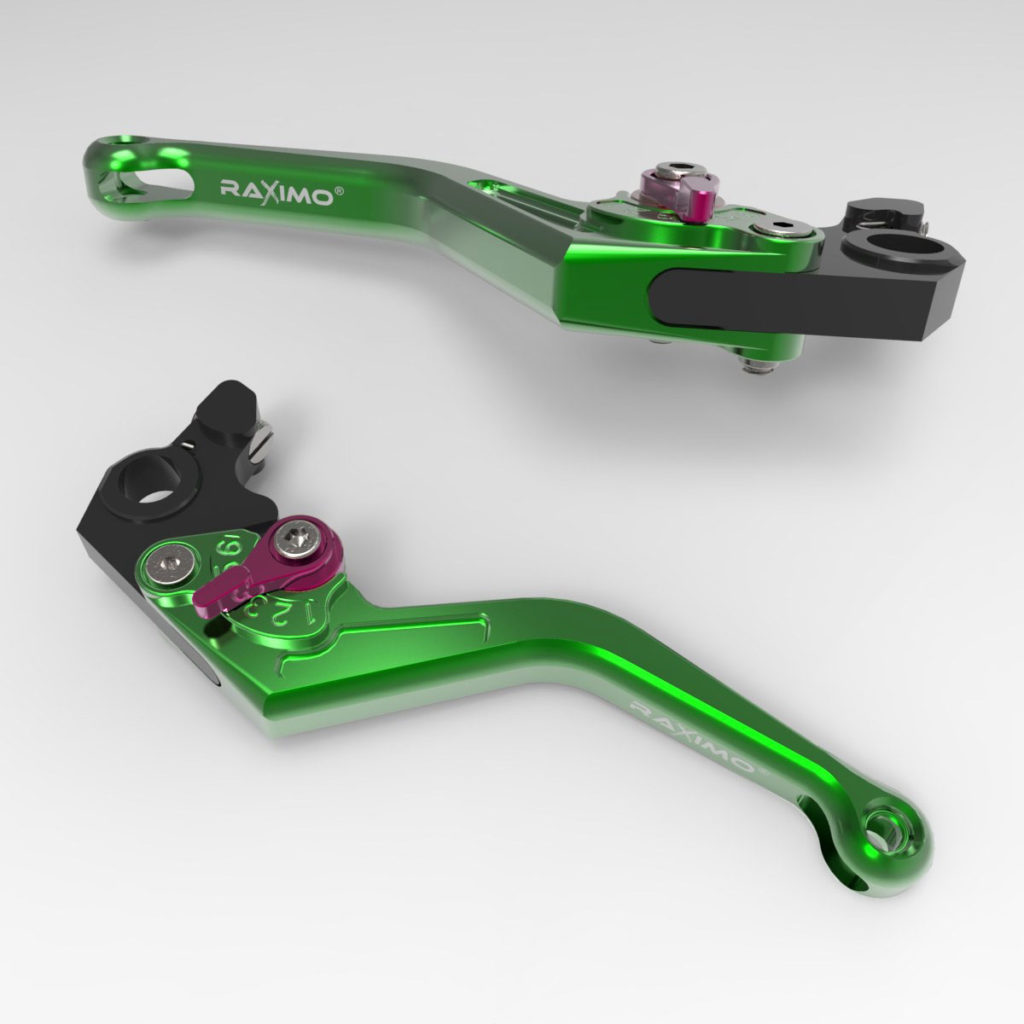
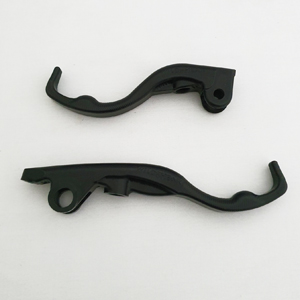
Raximo makes short (€100/pair) and long (€120/pair) replacement levers in aluminium with a large choice of colors. I’m sure you can select more tasteful colors than the ones below:
Watch out for the Chinese knock off on ebay or other. People have ordered parts and they never shipped, and some received 790 Duke parts (they are different, the Duke has a radial master cylinder).
For fans of short levers the wild@heart levers have a small cult following, and are described as the best short levers ever. Molded for two fingers, with a long end stop (3000 SA rands, around 145€/$170). advrider thread.
wild@heart
Handlebar clutch switch
There are a few reports of the handlebar switch failing, and the only notice is the Quickshifter no longer working, or the bike refusing to start when a gear is engaged. The replacement switch come with a cable long enough to get into the headlight, but you could just change the switch as it cost next to nothing at your nearest electronic store. See this how-to for example.
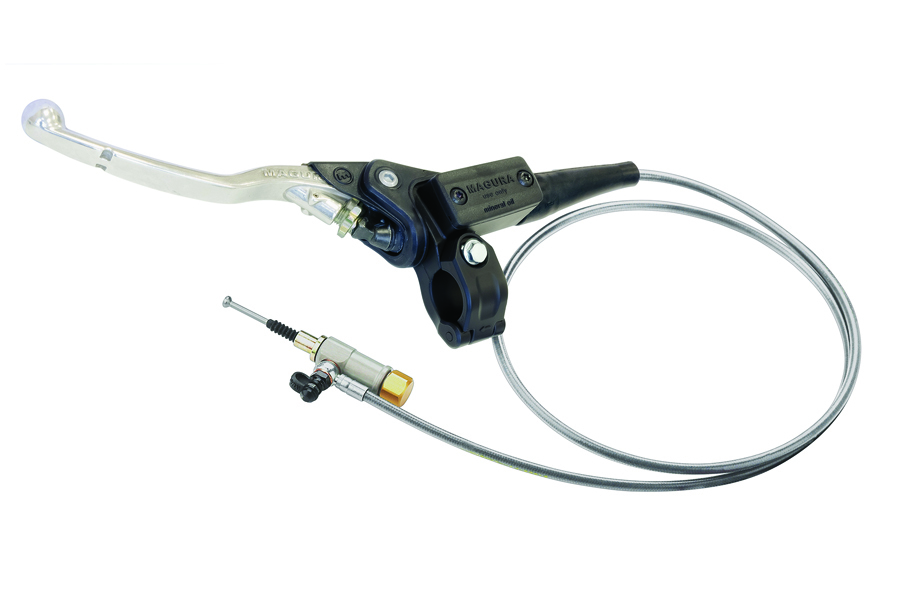
Clutch arm
A shorter clutch lever, activated with two fingers, is harder to pull than a full sized one of course. Short or long, Camel ADV made a small little gadget making the clutch course longer and diminishing the effort at the lever. It’s called the One Finger Clutch.
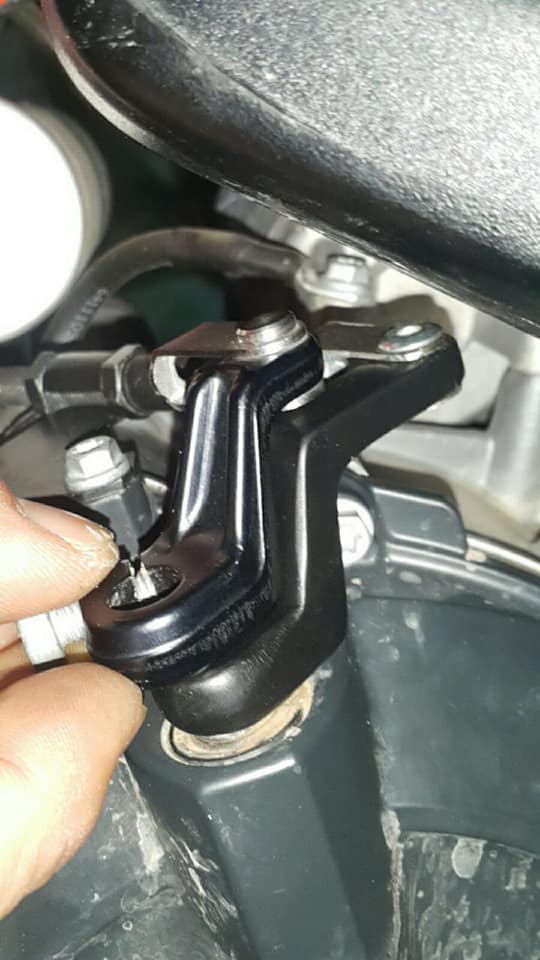
Ron Palm (Advronski) made a modification to the exposed side stand switch. It prevents any damage to the switch from stranding you out in the wilderness. If you ride off road a lot, maybe something to consider.
A dongle to bypass the switch is available from Vanasche Motorsports ($90)
Another cheaper option is to carry a spare switch, they cost less than €20 (p/n 93511045000)…
[Note: A recipe for a small switch bypass to carry in the toolbox would be nice]
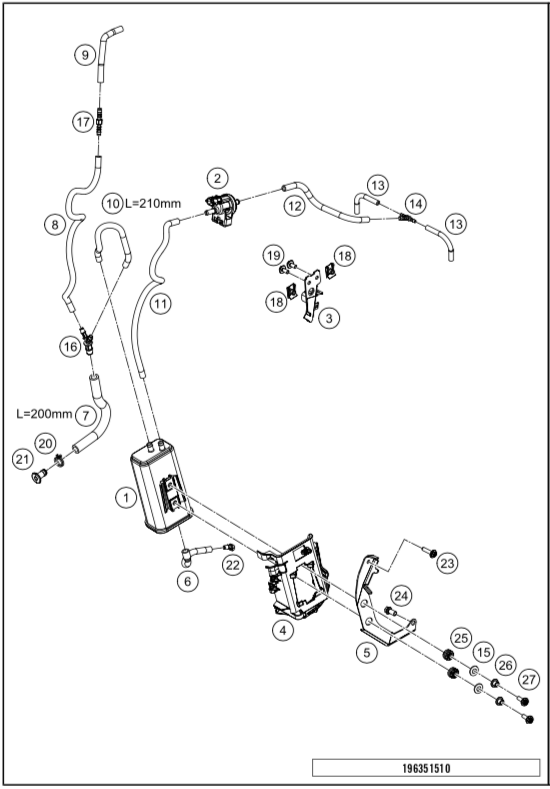
On the right side of the bike there is a little vent tube with a plastic 90º angle that clips on the right tank protection. It is labelled “Air” with a little arrow. This is the charcoal canister vent, aka it is indirectly connected to your fuel tank.
If this vent tube is not clipped in place it may touch the exhaust that goes along the bash plate (on the left on this picture) and the plastic will melt. There are cases of the melting completely closing the vent, meaning that the fuel tank is no longer vented and that pressure will raise inside. A heavily pressurised fuel tank is a huge fire risk…
Fuel venting circuit. The plastic clip is #22.
Not to mention that this vent that may leak fuel if you tank is overflowing: probably not the best item to have dangling over the really hot exhaust.
Always double check that this vent is properly clipped at the right place every time the bash plate is removed. And when you collect the bike from the dealer as the bash plate is a dealer install.
We use cookies to (1) ensure that we give you the best experience on our website and (2) to measure statistics about the site usage, anonymously. If you continue to use this site we will assume that you are happy with it.OkPrivacy policy


Recent Comments