Search the FAQ

Month: June 2019

3D Printed GPS support

For other supports, see GPS mounts.

I designed two GPS support. The first version was very simple and only need drilling to set in place. But it failed once, and once is one too many. Please stop using that mount or at a minimum use a tether.

The second version is more robust, uses threaded inserts to keep thing in place. But it requires more DIY work.

All my designs are free, I provide the STL ready to print and also the OpenSCAD file used to create it, allowing you to modify the design if you wish. OpenSCAD is free and can be installed on any computer.
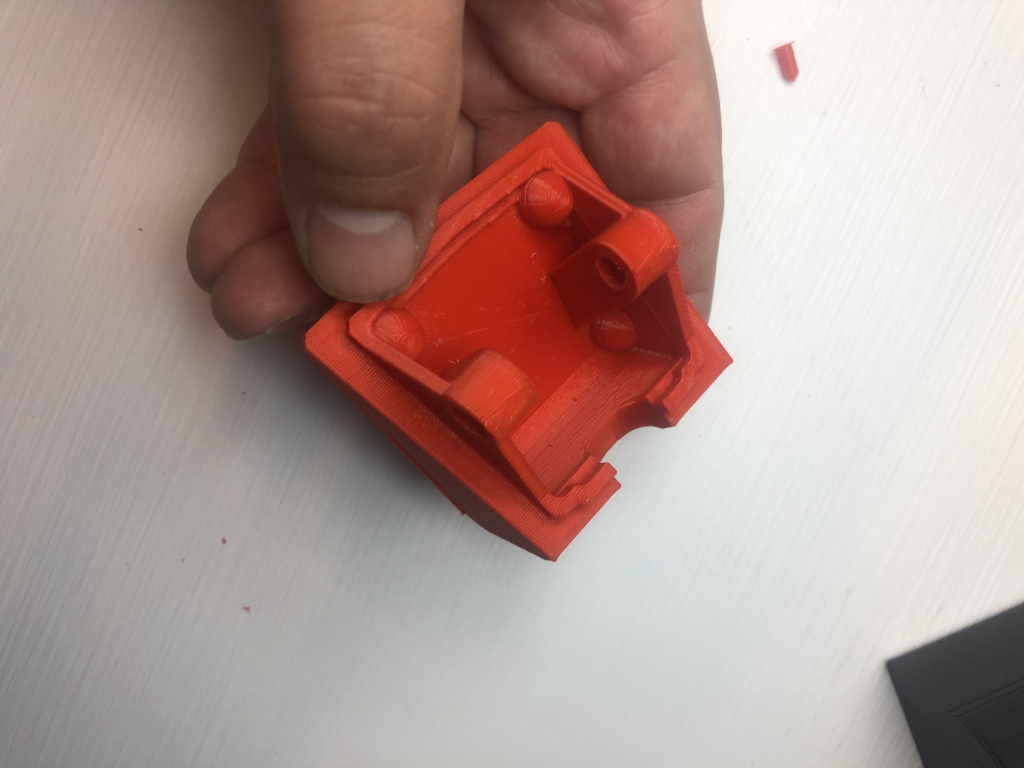
Original version (bottom), vs version for inserts, both fresh from printing.

Original simple version

The files are still available on Thingiverse. If you print or have printed this design be aware that the tabs holding the mount to the bike can break. At a minimum please use a tether (any kind of line preventing your GPS to fall if the tabs break).
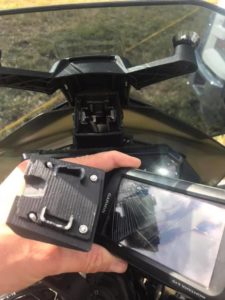
Version with inserts

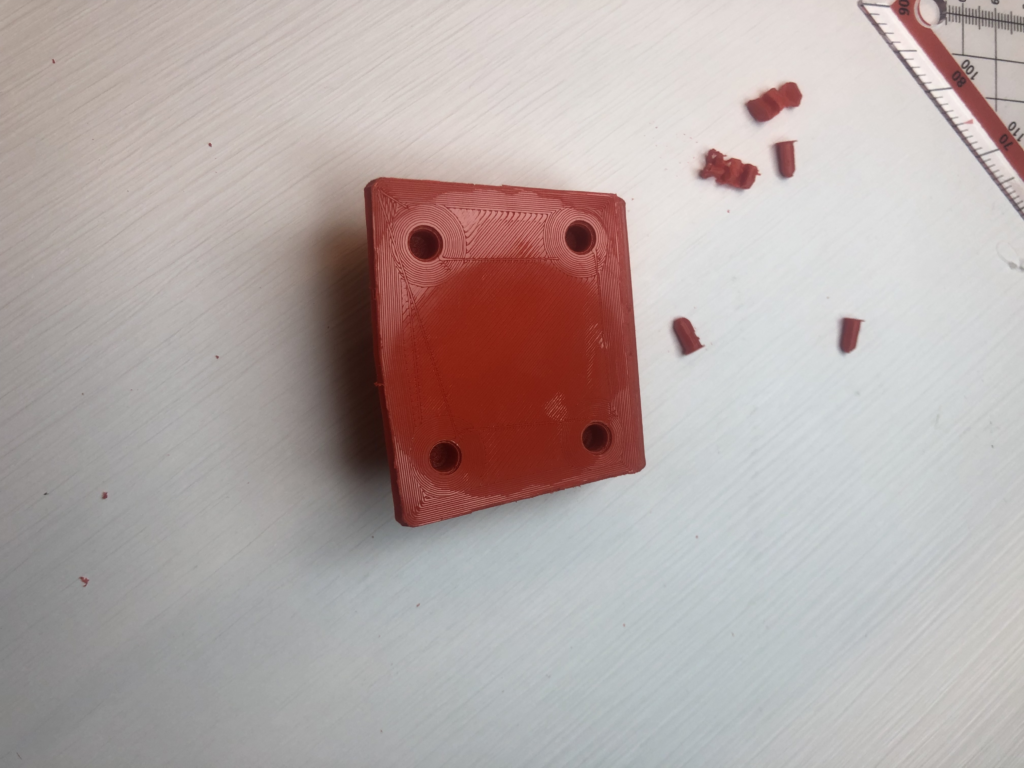
This version is sturdier, but requires some manual labor once the part is printed. So first you print the part using your favorite techniques. The STL is also available on thingiverse. Note that for extrusion printing the part will need supports for all the holes.

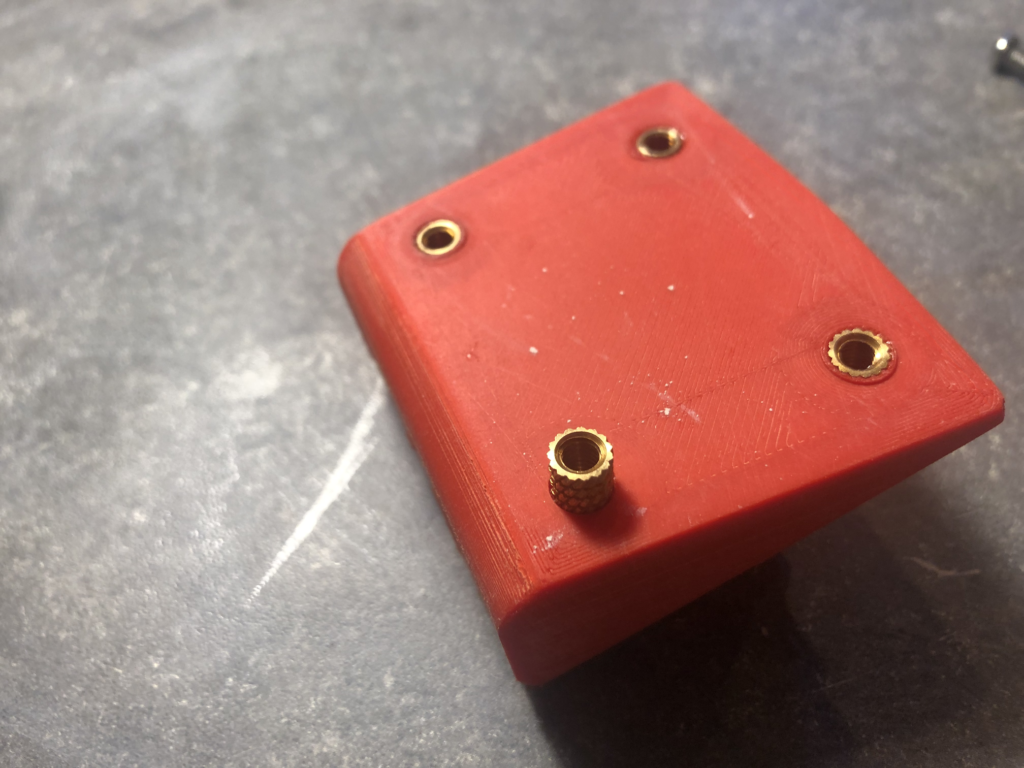
Then you need brass inserts and fit them. I found mine on amazon, but those are very easy to source. the part is designed for two type of inserts:

  • Two M5x10x7 to insert in the holes connecting to the bike
  • Four M4x10x6 for the AMPS pattern

To insert them put them in place in the entrance of the hole (there is a lip for this purpose in the print) then use a soldering iron to make it hot and let it sink in the plastic by using just the weight of the soldering iron, don’t push! When it is getting very close to its final position remove the soldering iron, flip the part and press it against something flat. this video should make this clearer:

Once the inserts are installed, putting it on the bike is trivial. Bolt it on. Then use 4mm screws to attach your favorite device.
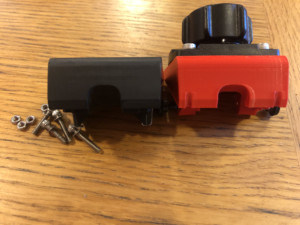
First design on the left, print with insert on the right, ready to go on the bike.

Mini Pump

Note: There are hundreds of minipumps. With or without backup battery, various attachments, etc. The two below are just examples, by the time you read this article, probably obsolete example. This article will no longer be updated, unless there is really a truly revolutionary pump that is specific to the 790.

Bruce Allen on FB found the perfect mini pump that fit snuggly into the rear tool compartment in the side cover (but put it in a plastic bag, it doesn’t like water)

Motopressor pocket pump

It’s called the MotoPressor pocket pump, comes from Australia, and can be found on various places online.

Stop & Go Tubeless Puncture Pilot Kit has been reported to fit in the side panel, with the pump under the seat.

Comments

The comments on this site are turned on, but are moderated and I will never publish them.

How come?

Well, the comments are an easy way to let me know that something is wrong in an article, allowing me to fix it quickly. But this space is not great for discussions. Think of it as a library: this is not the place to argue loudly about a subject, this is just a repository of knowledge.

So use the comments, but be aware that those are only a direct communication with me, just a little bit more convenient than email. I will work your comment in the text, or ignore it, or ask you for clarification.

Let me know if you want credit for your contribution by providing a link to an email, a profile, a web site…

And if you really want to argue, have a discussion, gather opinions, there are a number of forums you can use for this purpose.

Fuel Gauge

People are confused by the fuel gauge. Plus the fact that some of them where not calibrated properly lead to a lot of confusion.

First of all the fuel gauge only works for the second half of the tank. This is explained in the manual. For the first 10 liters the fuel gauge will show full and the range indicators will display a range with a plus sign, the range being the distance you will do on the half tank. For the second half of the tank each bar is approximately two liters.

If this is not confusing enough, there is also a special behavior of the fuel gauge, caused by the split tank design. The fuel gauge is mounted in the right side tank bottom. When the bike is parked, on the side stand, the fuel will will run to the left side fuel tank trough the connection tubing on the bottom. With little fuel (1/4 and less) in the tank most fuel will end up on the left side. When you start riding, the fuel gauge will indicate a very low fuel level, blinking red. After a few minutes the fuel will move over to the right hand side again and balance out, then the fuel gauge will show normal level again and the fuel range will increase to what it actually is.

In short, don’t trust the fuel level as you start the bike. Ride for three or four minutes to get an accurate reading.

This is not a defect, but a normal behavior of the tank design with two low halves. If KTM had mounted the fuel gauge in the left side, it would show a much too large level when you start riding, which might leave you stranded shortly after. One option would be two fuel sensors, one on each side and some software to clear things up, but hey, more complexity, more money 🙂

Note also that the fuel tank has two valves on the bottom, one on each side. If you tank reads full but your bike stops, check that the last person who touched the bike actually opened *both* valves.

About this FAQ

This FAQ is maintained by Éric Noyau, but its content is build on the wisdom of many 790 Adventure owners around the world.

I do not intend to update this FAQ for the 890. I do not own a 890, and nobody volunteered to update everything for the 890. This site is going to stay up for future owners of used 790 looking for info.

I was first inspired to capture some information in one place after reading a post from from Tim Cullis on UKGSer.com: he made an awesome list of KTM parts that I thought was going to get buried in a thread. So I copy pasted it into a google doc for my own usage. And from then on every time I saw something interesting on a thread somewhere I added it to the same doc.

After a while the doc started to contain plenty of valuable information so I shared it on various forums. People liked it, send me some info to add or to clear up. But it was becoming unmaintainable in one big file with a rubbish URL impossible to memorize.

So I invested 15€ on a domain name, installed a new vhost on a server, started a new instance of WordPress and here we are.

And more importantly: YOU CAN HELP. If something is wrong, something is missing, just leave a comment with links to the source. And if you want to help me maintain the site, sure, it’s also possible.

I wrote a privacy policy, please read it. Nothing fancy in there, just some explanation about what data is collected, why and where.

Gear lever linkage screws not tightened properly

[If you have a 2020+bike, don’t worry, these are now coming with some threadlock from the factory]

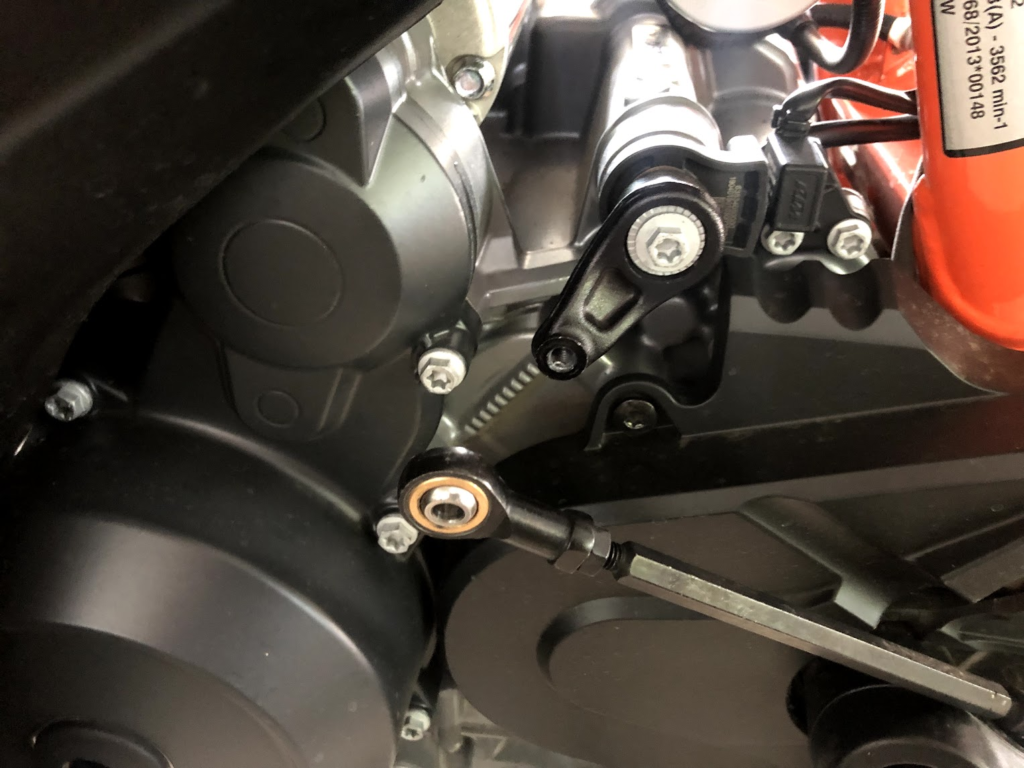
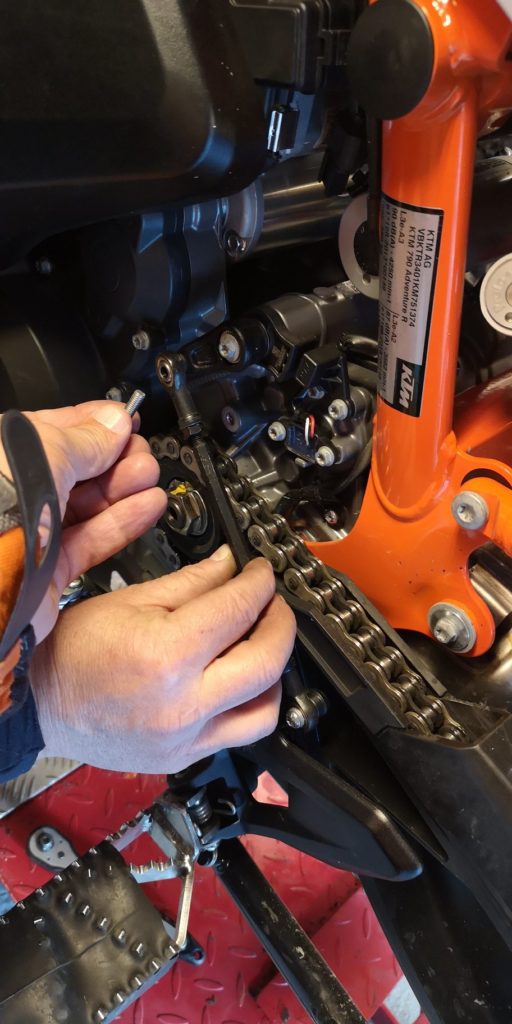
Check the screws linking the gear knuckle and the gear linkage. It has been reported multiple times that these screws like to fly away. There is nothing to stop the screws from unscrewing, and no thread locking from factory. Remove those bolts and use of a thread-locking liquid before putting them back (Loctite or equivalent).

The manual list the torque for those bolts at 10Nm (7.4 lbf ft), and the use of Loctite®243TM or equivalent (Page 333 of the R version of the manual). Do not overtorque “for safety”: the knuckle is aluminium, over torquing will destroy the threads.

Image from Éric Noyau on advrider KTM 790 adventure thread
Image by Roy Andersen on the facebook group ‎KTM 790 Adventure


Oil leak

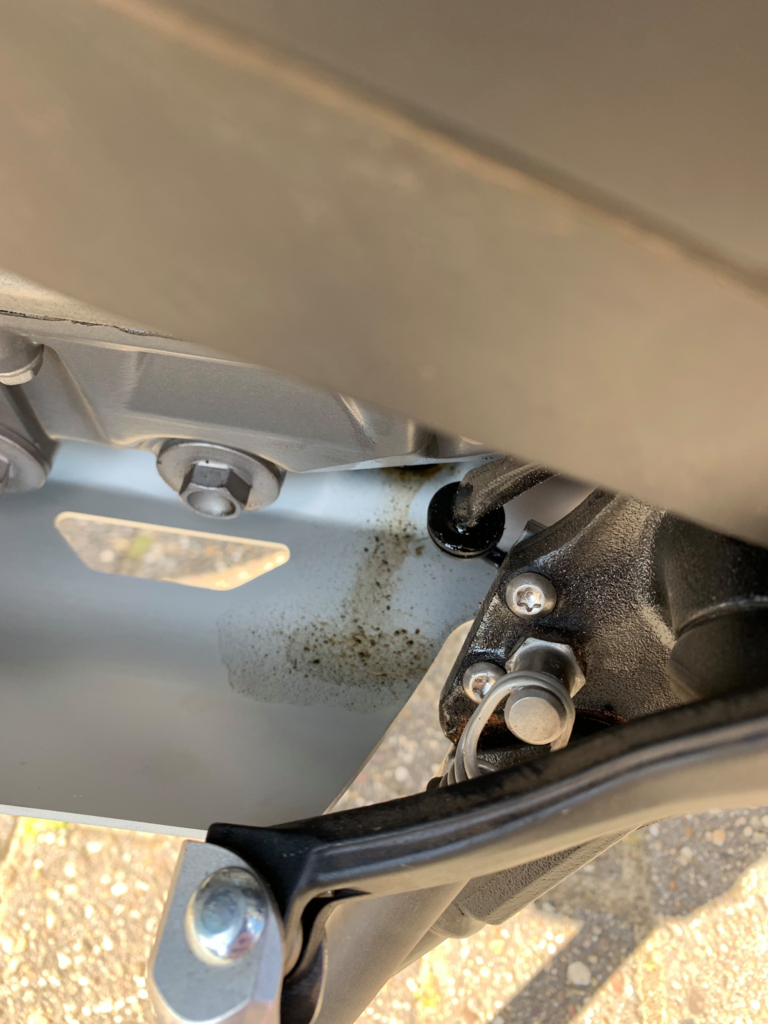
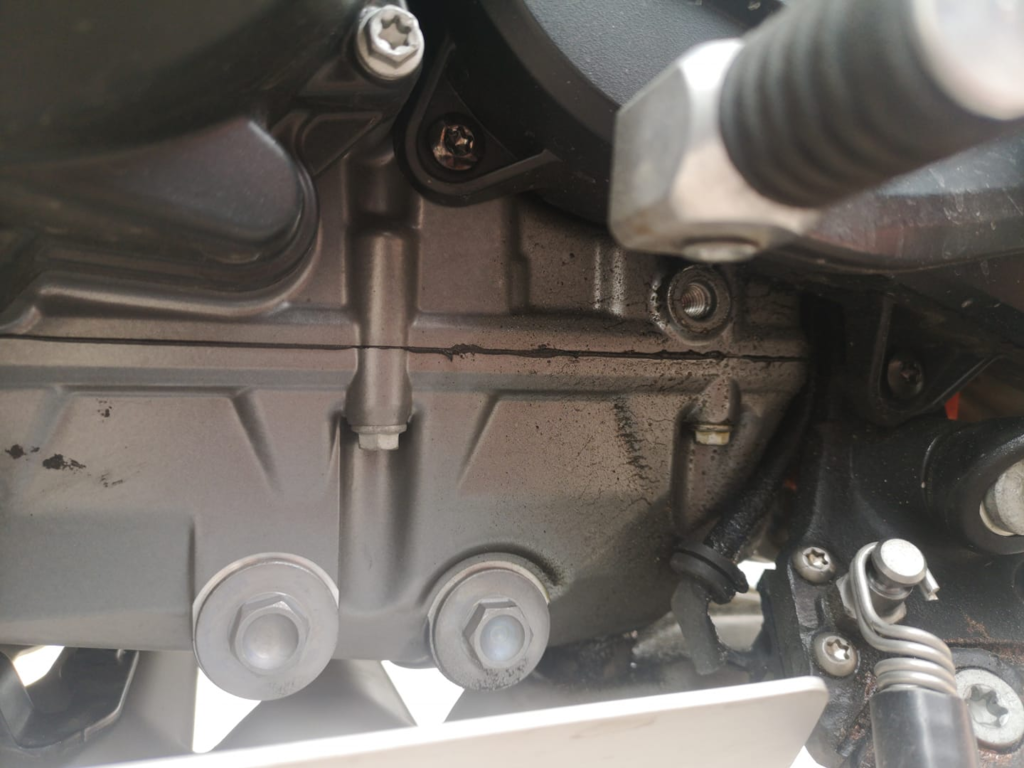
Bikes were reported to leak oil on the rear left side. For most bikes this is not a leak: this is chain lube. It collects in the pinion cover and runs down the engine. The chain out of the factory is coated with a very fine oil that is very liquid when warming up. As long as you don’t see the oil level decrease in the engine just forget about it and ride.

Image from Rinus Werkhoven‎ on the Facebook group KTM 790 Adventure

Image from Rickard Holtemark‎ on the Facebook group KTM 790 Adventure

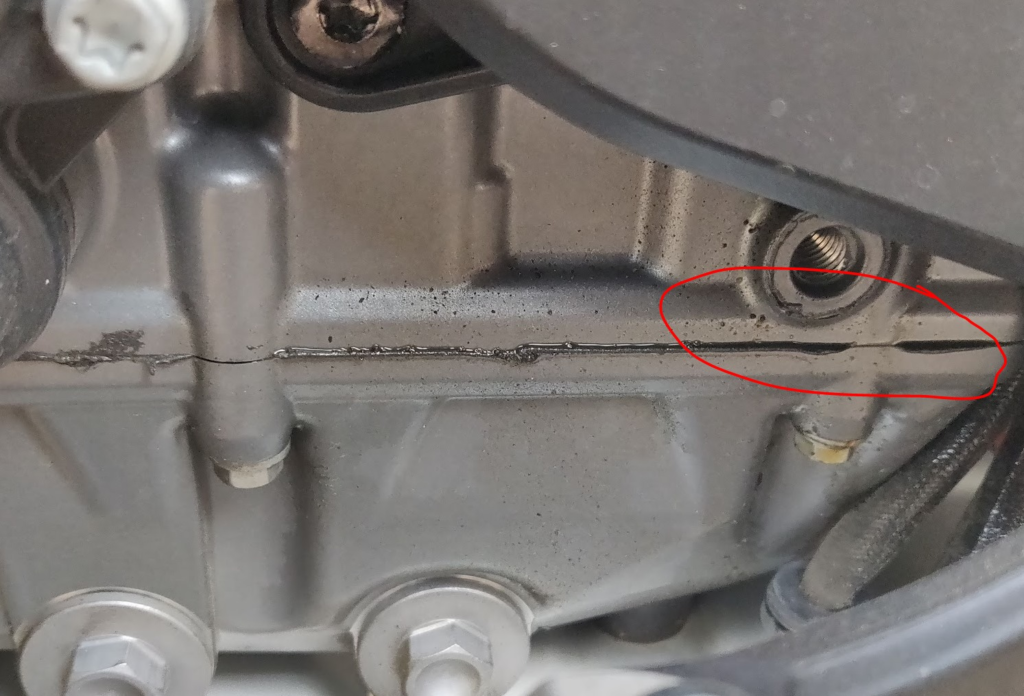
But is seems that a small number of bikes may be affected by a leak from the oil sump gasket.

From Christian van Mertherson on facebook
Next Page »