Go with saddlebags with no hard support. Cheaper than the other solutions, but these will scratch the sides, and volume will be limited.
Installing a scaffolding to get side rack in place. On the racks one can attach aluminium boxes or soft bags. This also has the side effect of protecting the back of the bike and most notably the exhaust in case of spills. Can support lots of storage, but can be very wide.
Installing touring panniers. With small inconspicuous side rails. Those are intended for road use, basically the same hardware as the 790 Duke, and are less robust than proper adventure side rack. If you don’t plan to do any off roading this may be a good choice.
KTM offers side racks, Touratech panniers, and touring Panniers. You can mount third party bags and panniers on the touratech rails. See the article on third party luggage for non-KTM options.
Black aluminium Touratech panniers for KTM
Touratech side racks are needed, p/n 63512912044 at about £235.
Then add the two side boxes p/n 63512922000 (45 litre) and 63512923000 (31 litre) which are about £393 each
Add the locks (they can be keyed to be the same as the top box)
Total cost £1020. Cost of the complete Touratech setup (side case plus top box) is > £1600.
Warning: this setup is really wide; this makes the bike 106cm wide
Touring Case Set (panniers)
36 and 30 litre, p/n 63512932044, about £700. Needs mounting rails, p/n 63512012044 about £209. Total cost £909.
The rear rack shipping with the bike is not great. Attaching a roll bag is not obvious: attachment points are not aligned and only on the side… The attachment points are the same as the KTM 1X90, most racks for those bikes should fit on the 790 (warning however: the length of the bolts are different, 1X90 bolts are too long for the 790).
There are two common uses for a rear rack: Attaching a soft bag sideways or lengthwise, or clipping a top box.
With KTM parts the first thing is to get a carrier plate (P/n 60612910044) for £113. And then plonk on it another parts depending on your needs:
Rear rack: A very large rack with a lot of attachment points to put any kind of bag.
Rack: (P/n 60312978044) costs £87. This rack is very wide.
Carrier plate (P/n 60612910044) for £113
Total ~£200
KTM 48L top box. Basic top box :
Top box itself (P/n 62012927000) about £261.
Carrier plate (P/n 60612910044) for £113
additional carrier mount (P/n 60312927000) on top of the plate, about £43,
Total ~£425
KTM touring top case, a smart looking 36-litre top box
Top box itself (P/n 63512929544) about £437.
Carrier plate (P/n 60612910044) for £113
Total £550.
Black aluminium 38L Touratech top box:
Top box itself (P/n 63512929044), about £393
Carrier plate (P/n 60612910044) for £113
This needs an additional carrier mount (P/n 63512927044), about £87
Don’t forget the locks, they are not included in the price.
Total £600+
Third parties do excellent solutions in this space, simpler and cheaper.
For example the perun moto rack allows for mounting with or without the handles, and can be accessorized to mount various top boxes from Givi/Kapa/Rotopax/SWMotech/Kriega… $129 plus shipping from Serbia ($32 for Europe).
Bumot makes a rack and an aluminium topcase for a little less than €400 in two sizes (30L or 43L) and various finishes.
BDCW also makes a simple aluminium rack for $175. This one requires the removal of the handles.
To fit a lift you need to install pools. Spools threads are M10 x 1.5 pitch (It’s called coarse metric). This is exactly the same as the 950 Adventure.
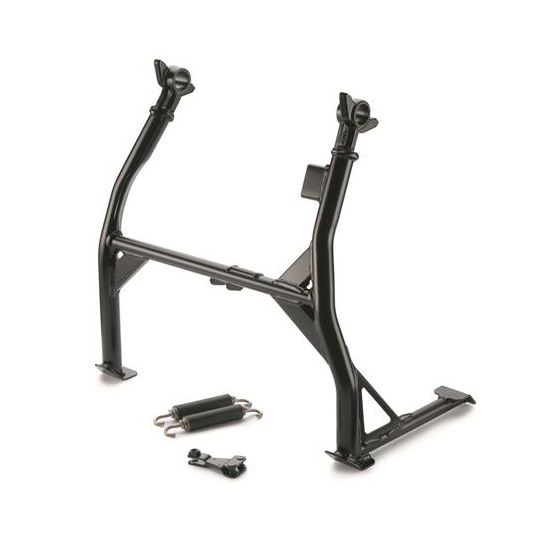
Center stand for the S (P/N 63503916044C1, £175) and for the R (P/N 63503916144C1, £175) have been announced at your nearest KTM dealer. Availability is announced for August.
KTM Centerstand
SW Motech has one for the S (manual), and one for the R (manual). Both at the price of €180. Example of install. Some complaints of the arm being a bit too short, with insufficient leverage making the operation of getting the bike on the center stand hard. To the point of returning it. Other have complained about “the lateral clearance clank noise”. Also, in technical terrain the side sticks out quite a bit, with the potential of hitting the rider’s leg.
Outback motortech is also doing a centerstand. €165.
For those of you who don’t like a center stand, some useful gadgets exists to replace it, either out there on the trail or in the garage. One that works is the EnduroStar TS3 Trail Stand, a very compact tool that can squeeze anywhere. $40. BDCW even drilled holes in their skid plate to accommodate it.
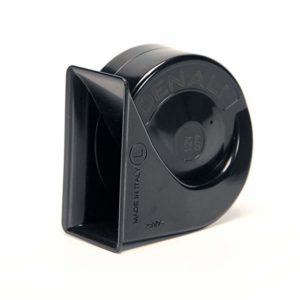
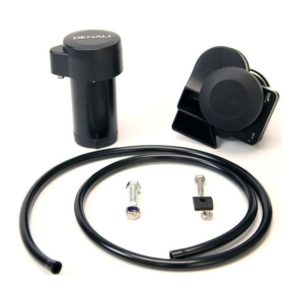
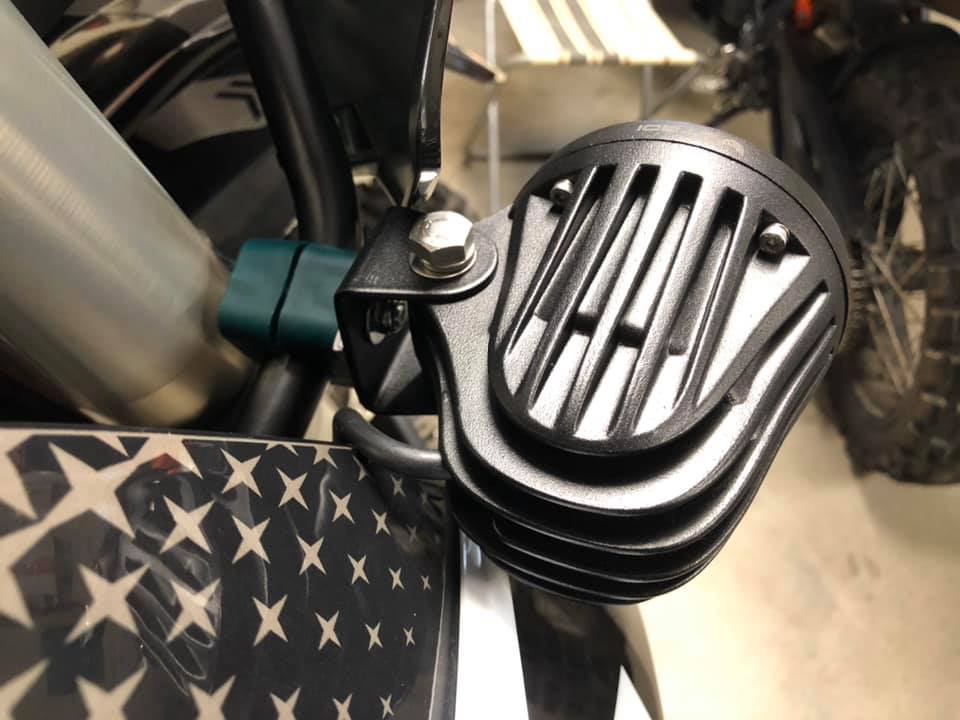
The denali sound bomb mini is a simpe upgrade to the original horn. It fits right there.
A denali split sound bomb without the compressor is also a direct fit in place of the original horn. Install is more involved as the compressor needs to be be fixed under the seat for example.
Warning: The denali pulls 30amp, way way more than the original puny horn. Fuses on the bike are all 10Amps. And since the fuse for the horn also controls the instrument cluster and the brake lights there is a high risk of blowing the fuse and losing those functions each time you use the horn if plugged directly. Please feed the denali from the battery, with a large fuse and a relay from the original wires.
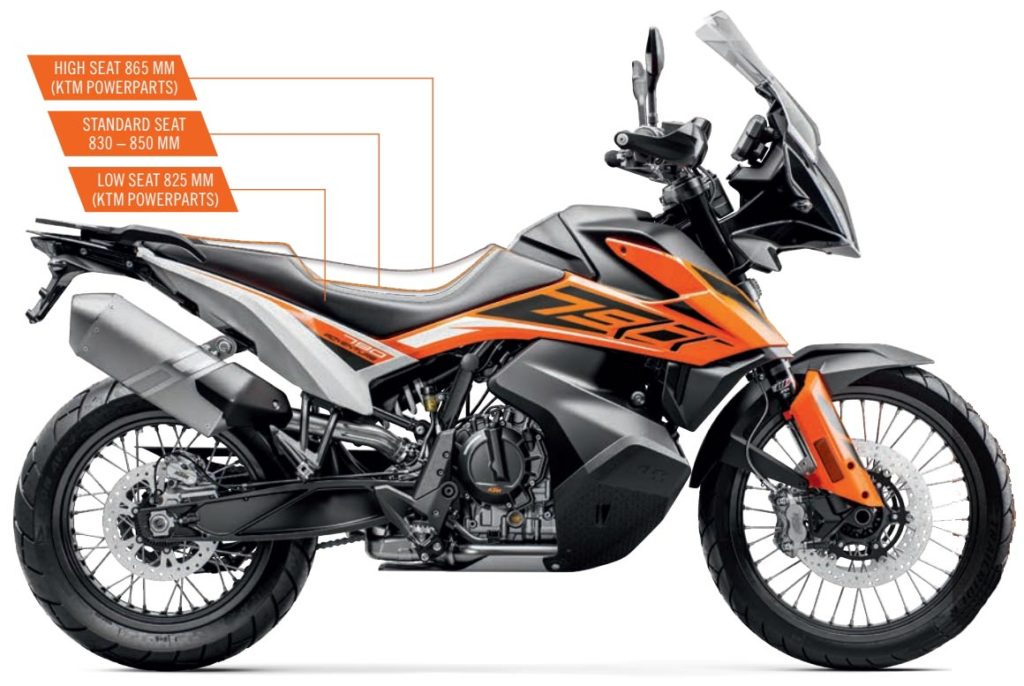
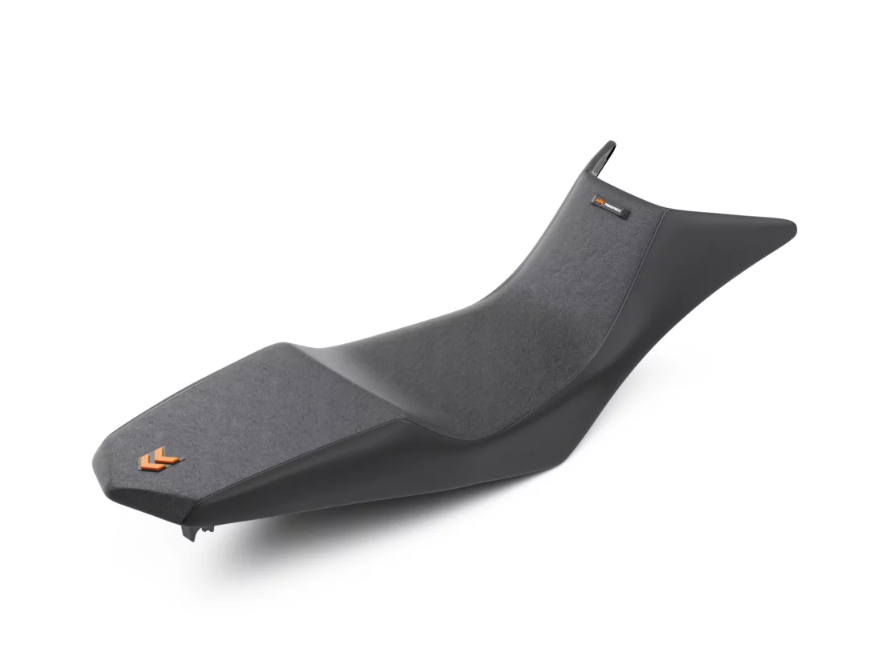
All the seats below are interchangeable between the R, the S and the Rally. The R seat and the S seat in high position are exactly the same height if installed on the same bike. In lower position the S seat height drops by 20mm.
Note that the seat height is not everything. The S seat is wider than the R seat, making it harder to slide and reach the floor, so on the same bike the S seat will seems higher. Same thing about the low seat, it is only 5mm lower than the S seat in low position, but it is narrower, making it easier to flat foot. And the same for the tall rally seat, standard on the Rally, it is tapered at the top, making it easy to slide sideways to put a feet on the ground, despite sitting higher than all the other seats.
Also, contrary to some other models, and like the heated grips, the heated seats are not controlled in the bike’s menu, but simply by push buttons. The driver’s one is supposed to be installed on the removable tab on the right side of the dashboard. See the manual.
Here are the KTM seats available on powerparts:
Seat
Part number
Seat height S
Seat height R
Seat height Rally*
Price (estimate)
Tall Rally seat, black
63507941000
870mm
900mm
910mm
£180
Tall Rally seat, orange
63507941000EB
870mm
900mm
910mm
£180
Single piece R seat
63507140000
850mm
880mm
890mm
£116
Two part S seat
63507040000 (front) 63507047000 (pillion)
830mm (low) 850mm (hight)
860mm (low) 880mm (hight)
870mm (low) 890mm (high)
£116 each
Two part Ergo heated seat
63507940000 (front) 63507947000 (pillion)
830mm (low) 850mm (hight)
860mm (low) 880mm (hight)
870mm (low) 890mm (high)
£270 (front) £220 (rear)
Low seat
63507942000
825mm
855mm
865mm
£180
* The seat height for the rally are questionable. KTM web site give it at 910. KTM Rally manual prints it at 923. Same for road clearance, the number are quite vague: KTM website list it at 263mm, same as the R, whereas the manual list it at 303mm which is adding 30mm height to the whole bike when only the fork was made longer, and as it sits as an angle it should not rise the bike that much. The numbers in this table have been recalculated assuming that the seat height of 910 is correct, and the ground clearance in the model table is derived from this as well. The values in the manual don’t correspond to anything that makes sense once compared with the peg/seat distance on the other models which should be identical. This is not helped by KTM giving the seat height for optional seats in differential values, which are probably rounded, or presenting marketing material with numbers rounded the other way, making it it close to impossible to get the right value in this table.
Some heights for the seat on the S. Add 30mm for the R
Low seat.
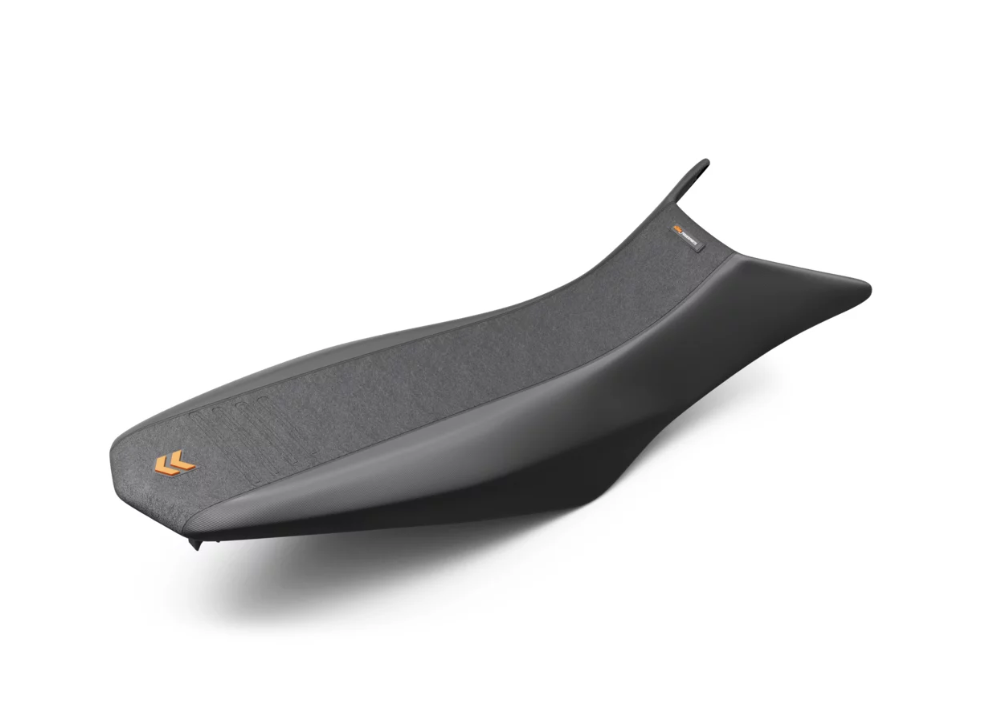
Tall Rally seat.
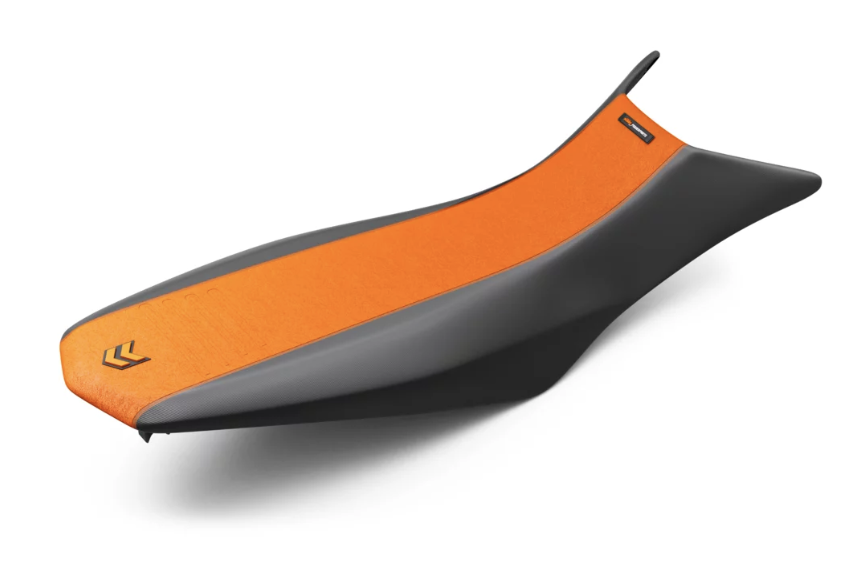
Tall Rally seat, in orange
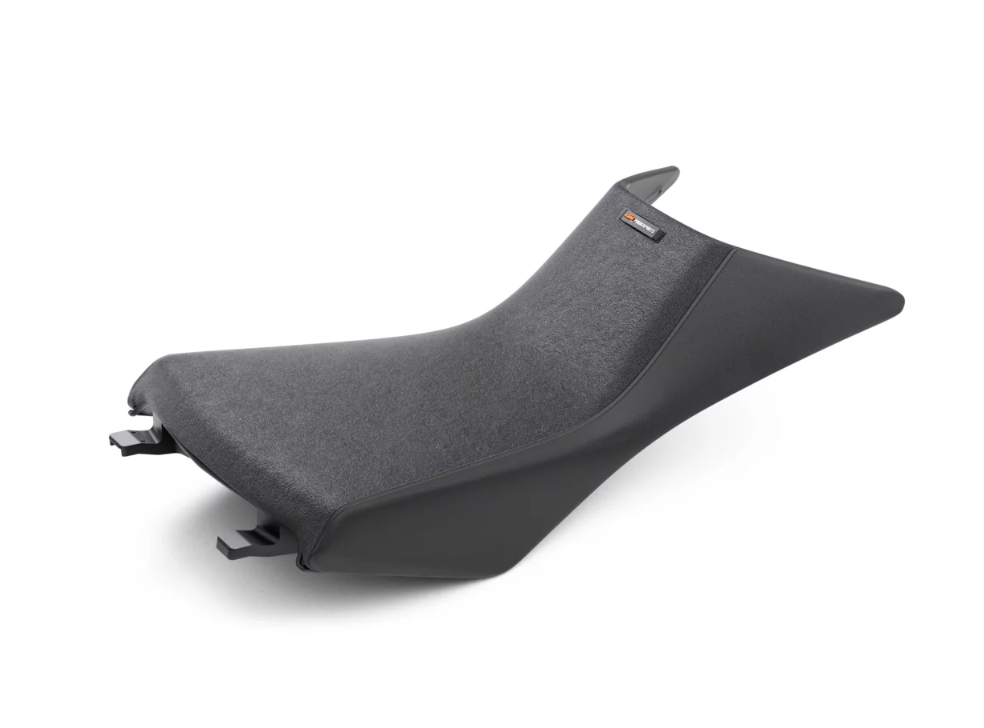
Ergo seat (heated)
Third party offers
Rebel X Sport propose a rally seat cover with logos on all sides to put on the R seat. This is a permanent transformation, the original cover is completely removed.
Seat concepts offers a bunch of one piece seats, with different heights, for $300 to $320 each. Warning, the low version has been described as “might as well be sitting on a piece of wood” by an owner who got rid of it.
Corbin also makes a seat for the 790, with optional heating, and a lot of option in their seat configurator (from $540 depending on options)
Tampering with the catalyser will make the bike illegal to ride on the road in most countries. Plus it’s bad for karma as the bike will be polluting more.
This said, you can find vendors selling straight pipes to replace the catalyser. But, be aware that the people at Coober ran the bike on a dyno with and without the catalyser and decided not to offer such a pipe due to the loss of power. They are working on a pipe that will replace the catalyser but still provide the necessary back pressure to avoid the power loss. (Coober confirmed their recommendation recently)
There is a thriving market to entice you to remove the catalyser, also know as decat. With various promises of more power, more noise, more torque, less heat, less weight, or something else.
Removing the catalyser has a lot of cons however that you should consider first:
The catalyser is there to make the bike cleaner. Reducing pollution is the only way to save our favorite pastime.
Removing the catalyser is illegal in most places.
This engine has been designed to have a catalyser installed. The engine management system will register the change, and will work outside of its normal range.
Unless you have access to an engine engineer, a dyno, the ability to make your own ECU plus some very expensive hardware to measure pressure and temperature you probably should keep the catalyser.
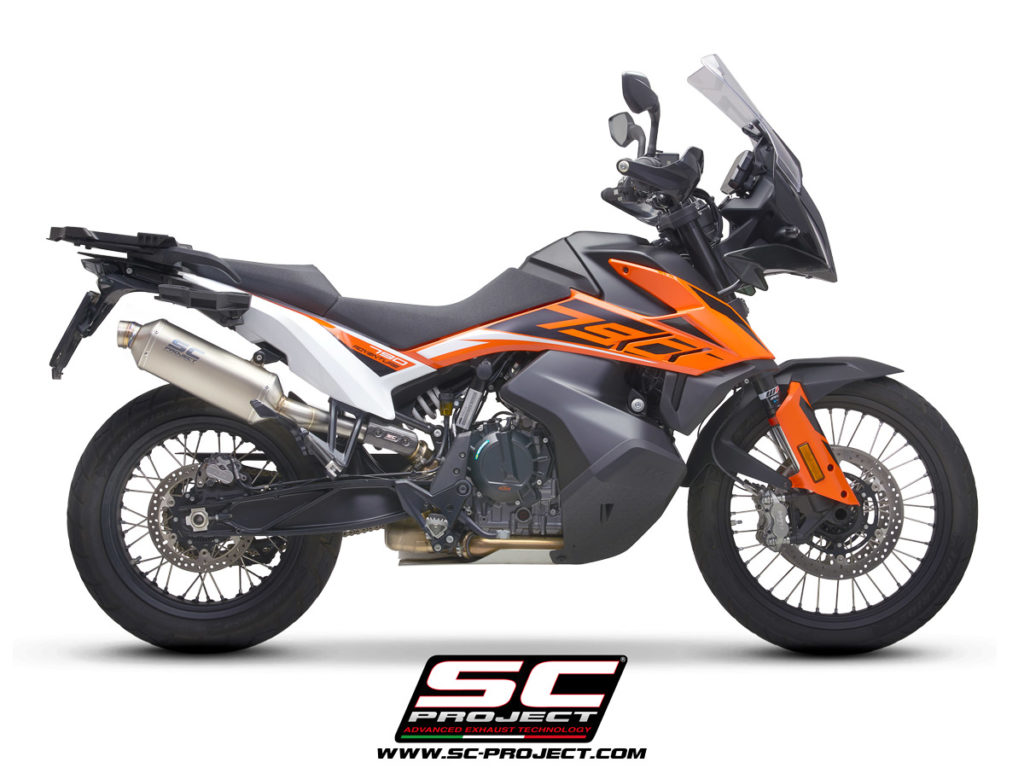
Slip ons
The main reasons to replace the original exhaust can is to gain space, weight, change the sound, or simply for esthetic reasons. Power or torque gain will be marginal at best.
You will find below, in alphabetical order, some replacement you can install. Most (all?) are lighter than the original can, and some may have the ability to remove internal baffles to make more noise (with no minimal improvement on performance, if not negative effect).
Note also that a new exhaust may interfere with luggage options, or passenger legs. Or even melt the turn signals!
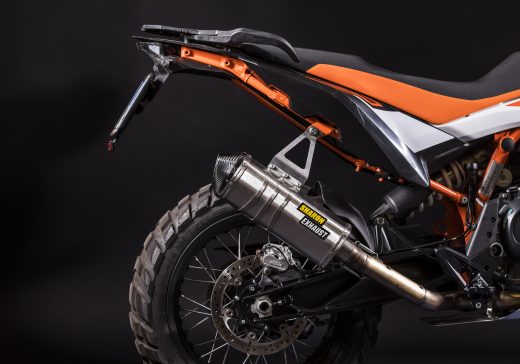
Akrapovič
Akrapovič p/n 63505979000, about £875. Availble as an option from your KTM dealer.
This muffler can be modified to remove the baffle by drilling one hole and unscrewing a screw. This is a picture of the necessary hole. Please note that the dimension of 32mm measured back from the end of the exhaust to centre of the necessary access hole to be drilled is not 100% correct. See this post or this video with additional photos for exact measurements. A plug can be bought from Akrapovič to close the hole, and it is referenced by KTM (P/n 76505099050), about €3.
Arrow
Arrow offers three different mufflers in alu and titanium, with removable db killer included. Optionally they also offer a mid pipe to replace the catalyser. From €500 for the slip-on.
GPR
GPR have 31 different slip on(!) you can order. And an optional decat pipe. GPR published a video showing some of these models mounted on a 790.
Buyers beware: there are a couple of issues:
Some models are not well designed for the 790, they are generic models that can be bolted on. This lead to disastrous results.
Also note this comment on this post by Raymond Wilson: “I have GPR on my 1290 Super Adv […] the GPR mounting system with the external collar that wraps round the pipe is crap. I see they’ve used this method on the 790 Adventure exhaust and this alone would deter me from ever buying one”.
Rade garage works with Sharon and offers a Rally style exhaust requiring the removal of the catalyser . €330. Not street legal. 3kgs lighter than original.
Sharon rally exhaust
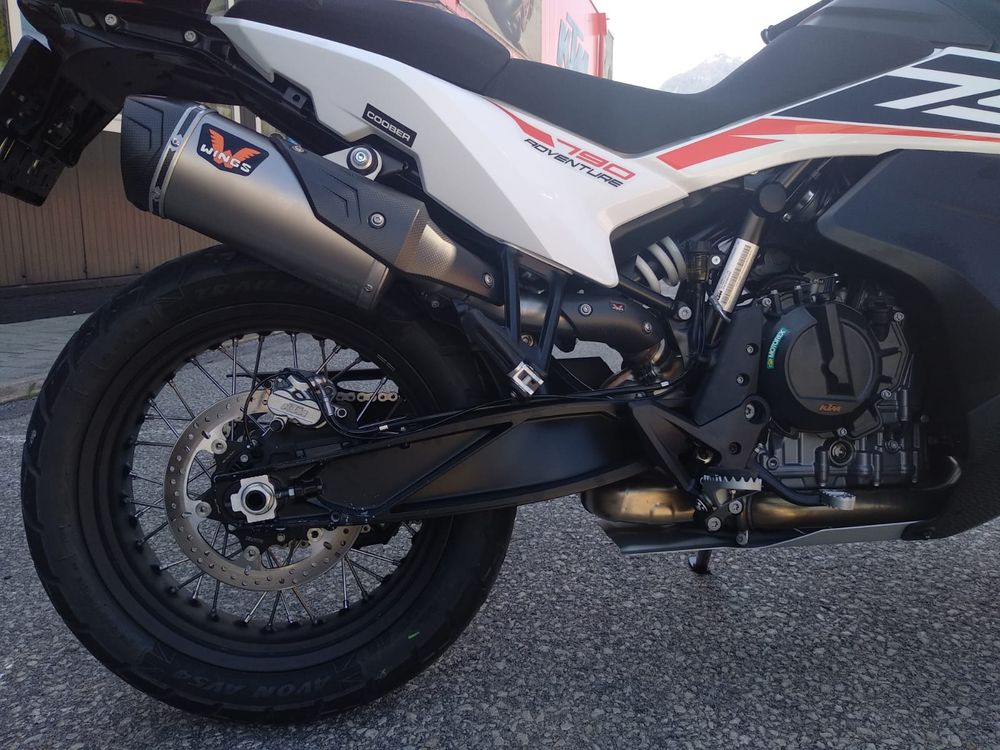
Wings
Wings. Coober couples it with an ECU upgrade. 2300g, 1.35kg lighter than the original exhaust. Includes removable DBKiller and spark arrester. €630 with the rear heat shield included. Heel heat shield is extra, €52. It is smaller than the original or the Akra.
Wings Exhaust
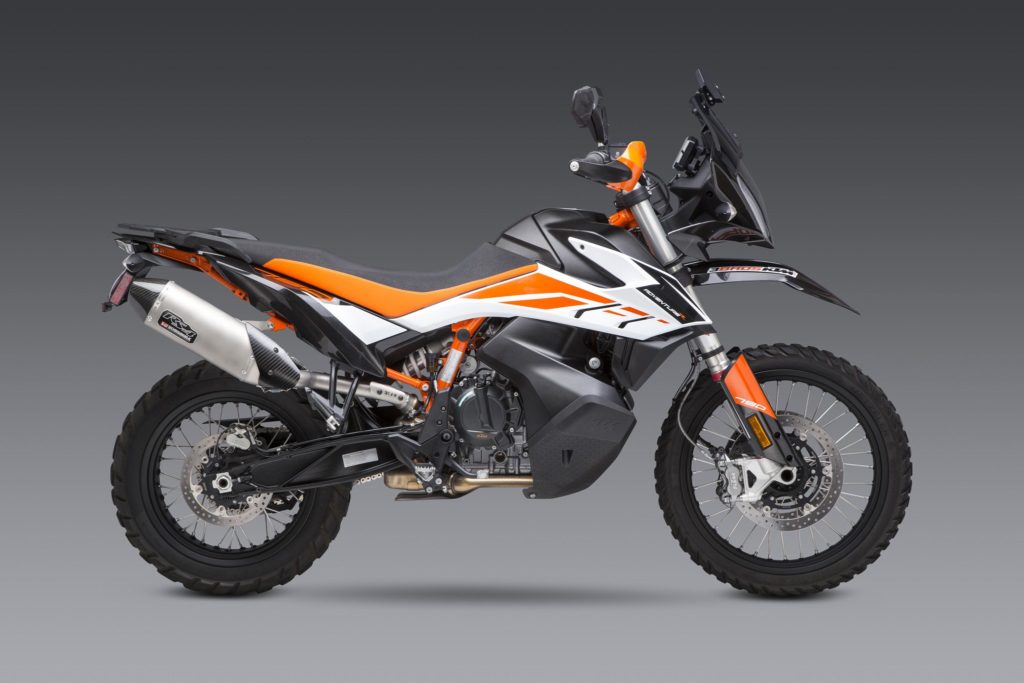
Yoshimura US
Also Yoshimura has developed its own slip-on. Two different DB killers and spark arrester can be purchased separately. Saving are less than 1Kgs. $600. Just a heads up, the Yoshimura RS4 exhaust sits taller than the stock making the installation of some pannier racks impossible. Also with the added height the blinker get hit by heat from the exhaust gasses.
The headlights are pretty good from stock. With 3 positions: DLR (peripheral lights), Low beam (middle lights) and high beam (top light). The bottom light is always on. Low beam is switched on automatically when the sensor on the dashboard detects darkness, or manually if DLR is turned off in the menus (this may be useful in fog for example).
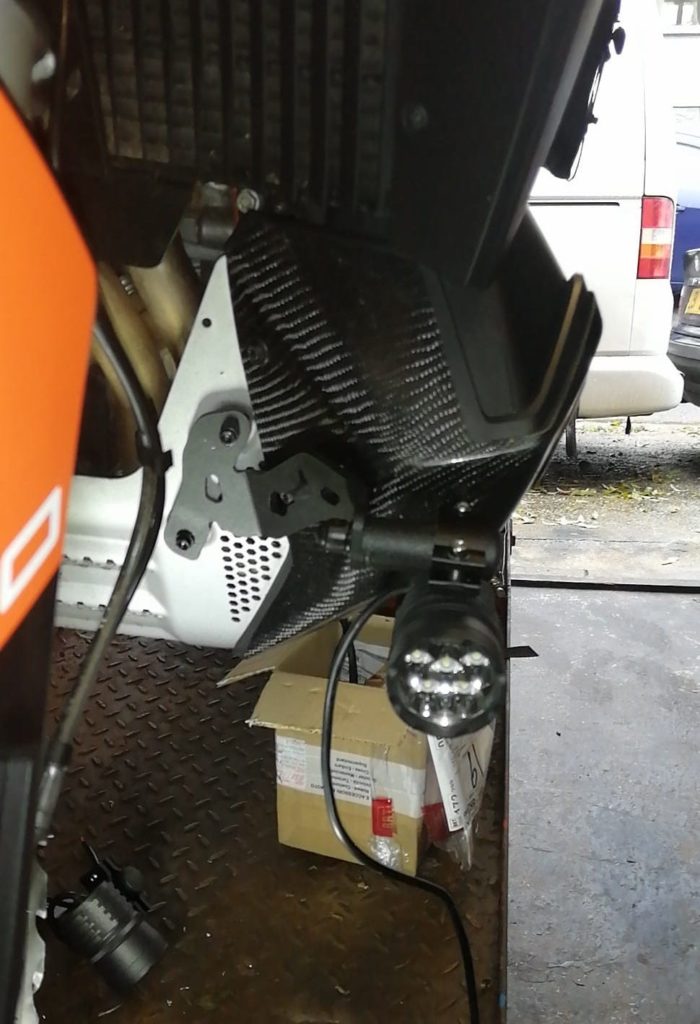
There is no obvious spots to put additional lights, and so far not a lot of installs have been published. I’ve seen a very long video with lights installed on the lower tube supporting the front end (but warning the clearance with the forks is very tight) and this very extensive install report on Facebook.
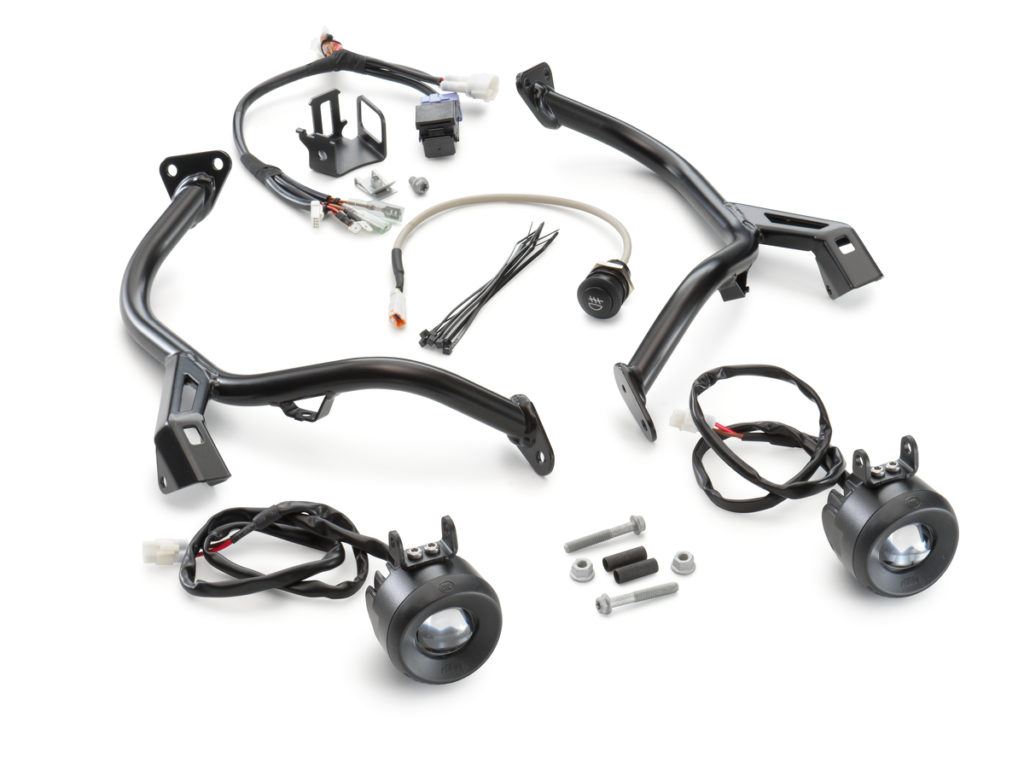
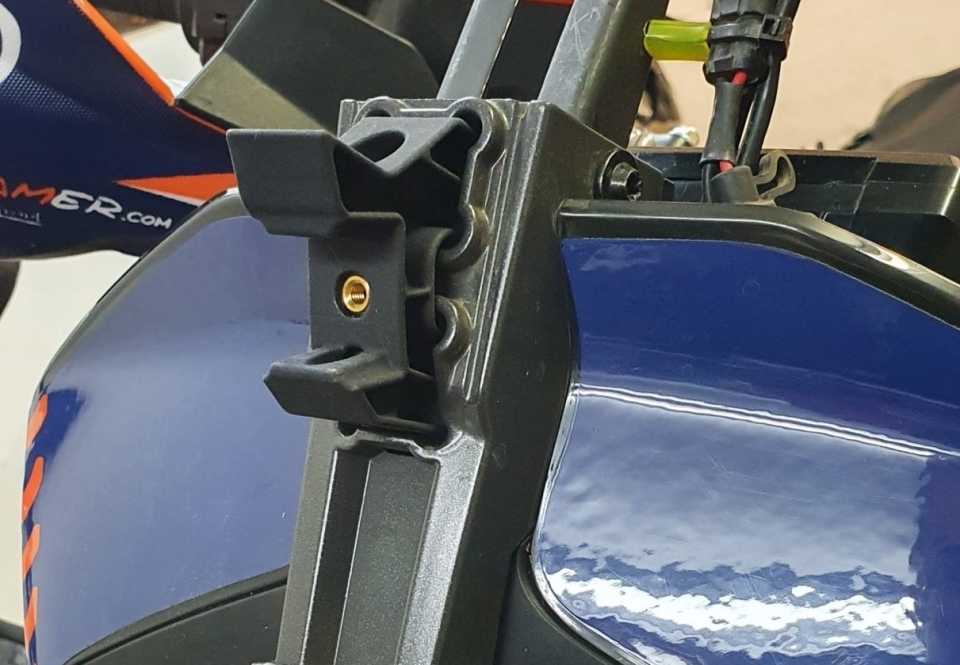
KTM added lights to its catalog: P/N 63514910033, 487€. Those are PIAA lights, made by Valeo for KTM. The hardware simply replace the metallic braces for the headlight, adding mounting points.
The mounting braces are available stand alone as p/n 63514910044, €150 for just the bars without any connector.
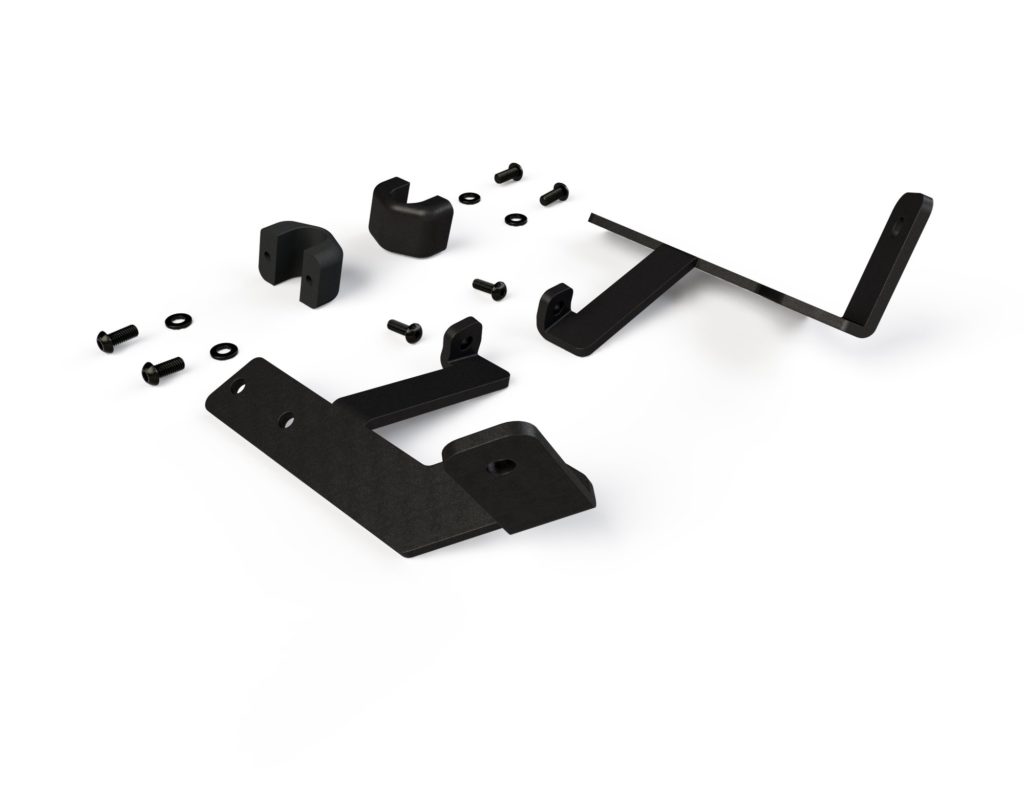
Denali offers 790 Adv specific mounts, mounted on the same tube under the instrument cluster, with an additional leg to stabilise it and not just relying on the clamp. $120.
Denali mount
BDCW also offers light mounts and optionally the associated lights to go with it. Plenty of options detailed in this ADVRider thread ($150 for the mounts, $500 for the mount plus some nice LED lights).
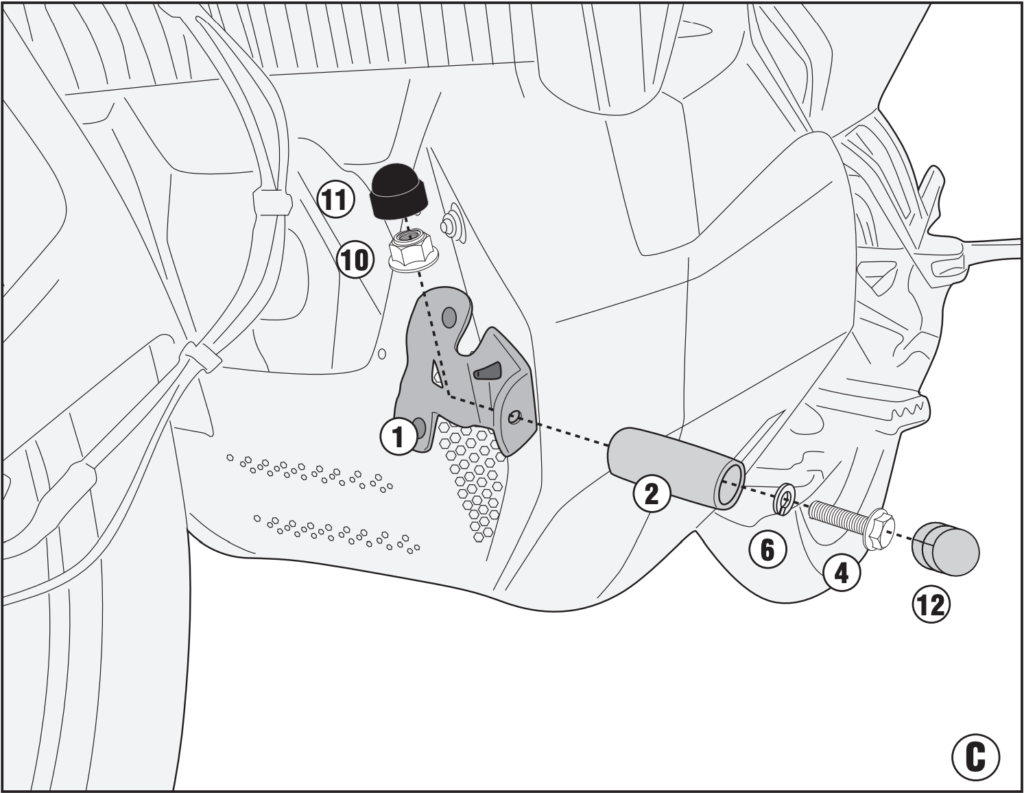
GIVI also has specific mounts for the 790, reference LS7710. Those are very low, attached to the bash plate, and not compatible with crash guards as they use the same attachment point. €60 or so. See this install report (more pic in the comments).
GIVI mount
There is a company in Columbia, Lion, making mounts as well. Their picture is from a S model, it is unclear if a R fender would clear the one fixed under the light housing. $60 each pair. The site is a little scarce on information.
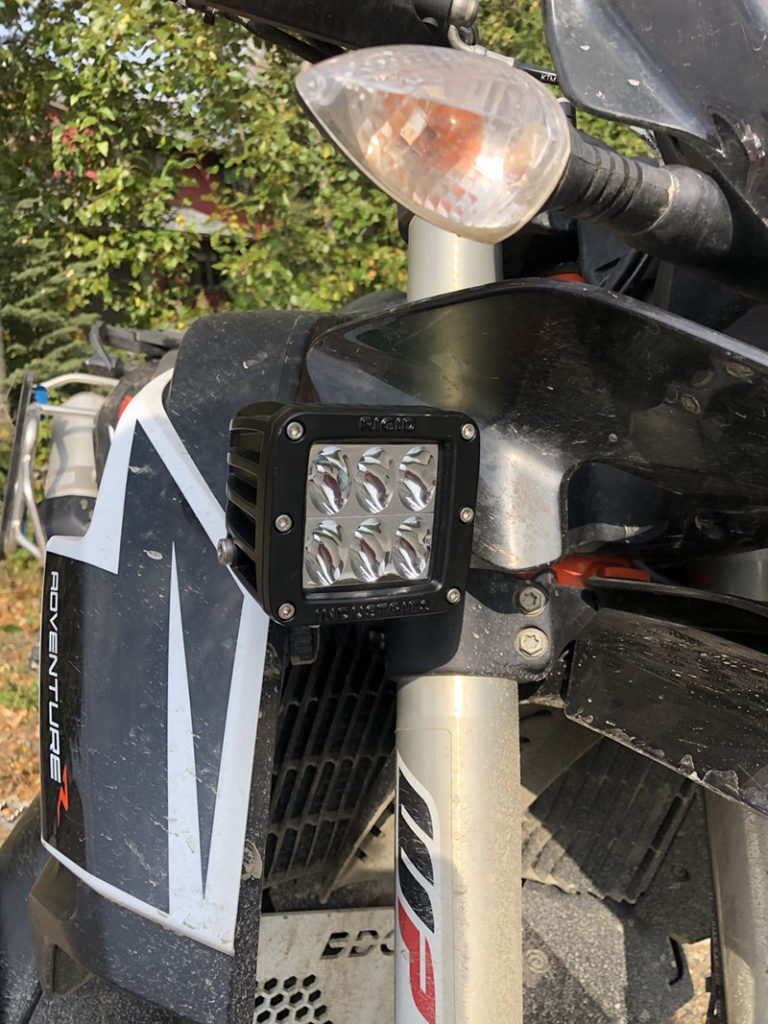
The cheapo option is to buy a 18mm “Stauff clamp” from a hydraulic shop and to use it to mount the lights on the lower bar. $10 for a pair. As seen on FB in a comment by Kris Eric :
You can replace the annoying bolt holding the windshield in place by a nice one, but it’s $15 which is a tad expensive for a glorified M5 bolt! In a pinch a cut down GoPro casing know can do.
Another accessory is this innovative little doodad (€35) that goes between the the original holes and the windshield to simply move it into a more vertical position. Another similar device is available to 3D print (Website in Swedish, use Chrome translate feature to read it)
Windshield pusher?
Rally towers
I addition of replacement screens below, some manufacturers are proposing complete replacement of the whole tower, rally style.
Deflectors
A lot of people are very satisfied by little blade deflectors on top of the original windshield.Too many of those to list here.
Third party windshields
(This list is probably incomplete)
Puig has a touring screen available, €103, larger than the KTM options in clear, smoke and dark smoke colors. There is a one paragraph review at advrider: first impressions are: good for the road, but wobbly off-road.
We use cookies to (1) ensure that we give you the best experience on our website and (2) to measure statistics about the site usage, anonymously. If you continue to use this site we will assume that you are happy with it.OkPrivacy policy


Recent Comments