Search the FAQ

Category: Electrics and electronics

Everything powered by electricity, and all the driving assistances

GPS mount

See the article on power to connect the GPS.

KTM part

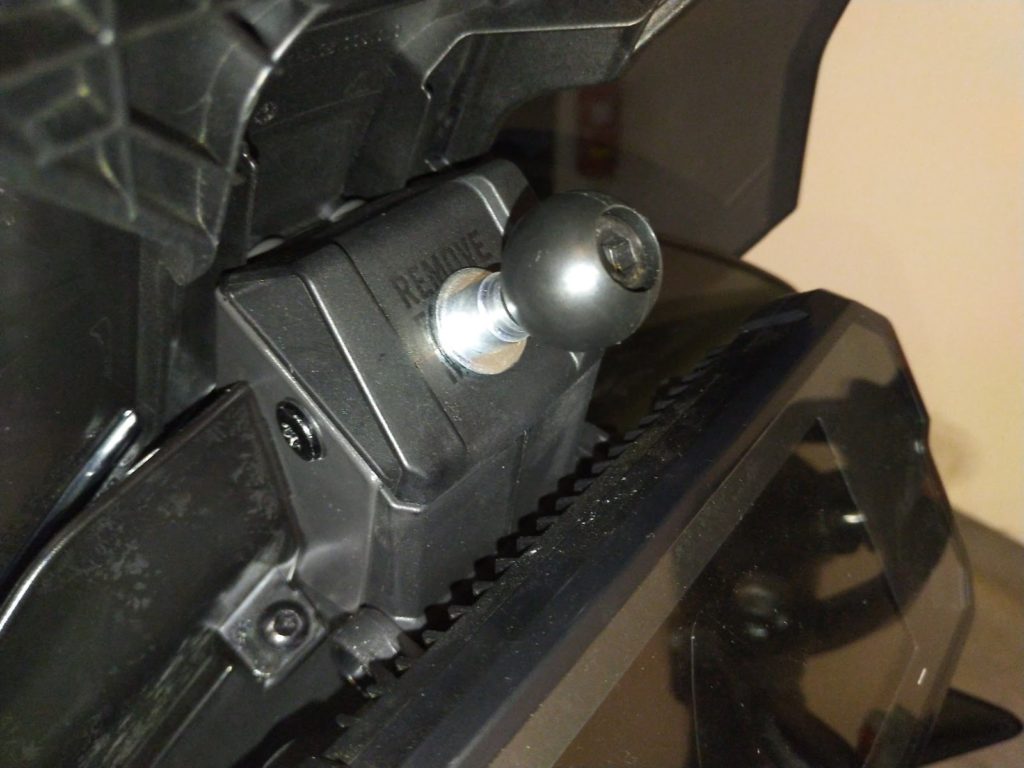
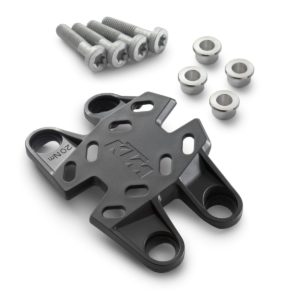
The most viewable place is above the TFT screen where the “Remove for GPS Mount” is. There is a part from KTM (p/n 63512992044, €58) but there is reports of some instability. Some others seem happy with it however.
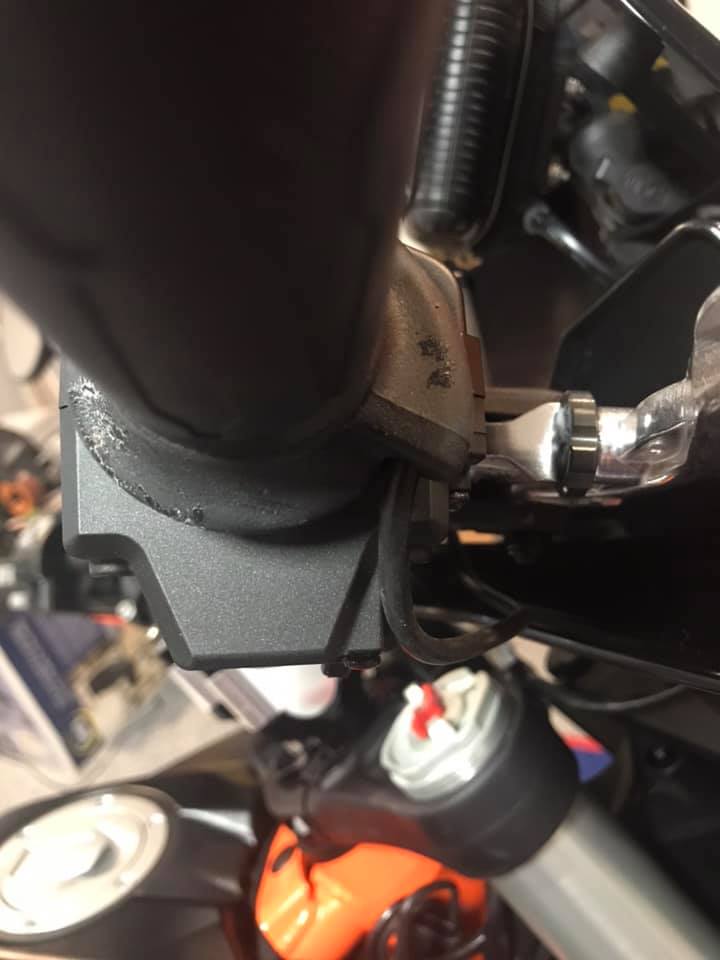
KTM Official GPS support

Drill Hack

In a pinch you can drill the part on the bike to put a RAM ball. This has been reported to be weak as the plastic part is not designed for it, and it causes vibration with large GPS. Innovative reinforcements have been implemented (back plate, epoxy glue filling…). But the tabs connecting to the bike are definitely not designed for this kind of load, if you do something like this do tether your GPS for safety.
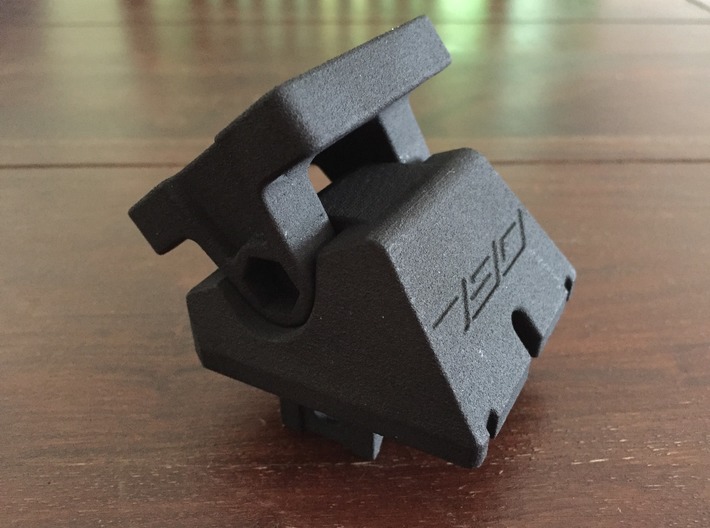
Ram ball screwed on GPS location – Krysař Krysař on Facebook

3D Print

Or you can print a support if you have access to a 3D printer, or pay to get it printed. It’s a simple wedge with an AMPS pattern on top and a hole to pass the power through. Check the page dedicated to self printing your GPS mount. Use with a B-Sized RAM ball on an AMPS pattern (RAM-B-347U), a short RAM Arm (RAM-B-201U-A) to a RAM ball fixed on the back of your device (Which for a Garmin device mount is probably another RAM-B-347U). But to tuck the GPS as much as possible a combination of a RAM ball on the GPS and a socket on the mount makes for the best clearance. The socket is not made by RAM, but can be found at various places online.

3D printed support in situ

MotoMinded took this 3D model, improved it, and is printing it in a sturdy material. The result is for sale for $22.

This is also now duplicated as a billet aluminium piece that you can find on aliexpress or similar sites for dirt cheap. It’s even using one of my picture on the sellers page. No link, as they never even asked for permission to use the design or my picture…

Chinese duplicate of the 3D insert version

There is another 3D printable model, only at shapeways (aka, you can’t print it yourself). It is in two parts, you have to buy both, and you’ll need one screw DIN912-M6x40 and 1 M6 hex nut. There is a suitable top for Garmin and Tom Tom, and adapters in 10, 20, 30mm are also available.
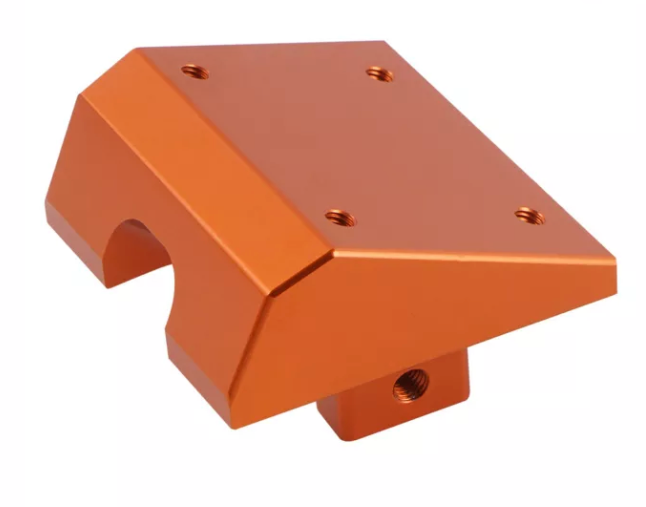
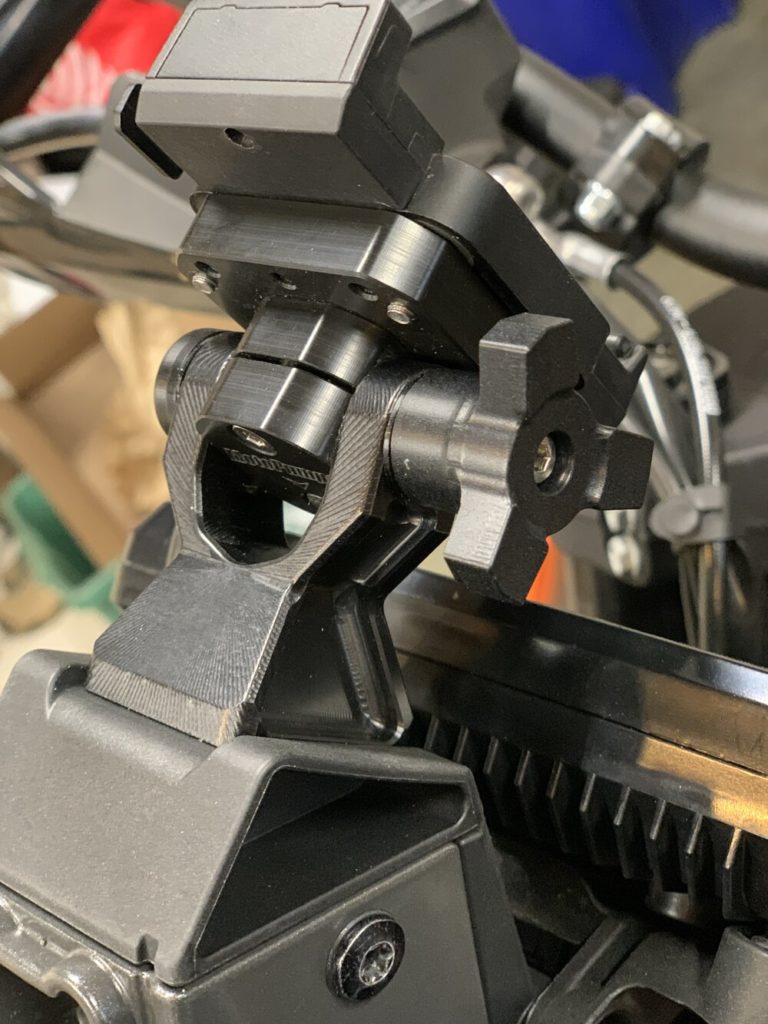
3D printed mount on shapeway

Vanasche Mount

The only mount machined from billet aluminium, with a design to pull the mount in place when tightening the screws, this is probably the most sturdy/stable mount available. Plus it allows for the cable to go down under it to get power. Available anodized orange or black. AMPS pattern. From Vanasche Motorsports, $100 (or Motominded). Also available down under for 170 $AU and in Europe from Offroad-Kontor (€120).

MotoPumps

The most recent entry so far in the market, MotoPumps offers an articulated GPS mount with an AMPS pattern that mount itself on the stock plastic part with strong reinforcement below. $80 with free shipping in the US.
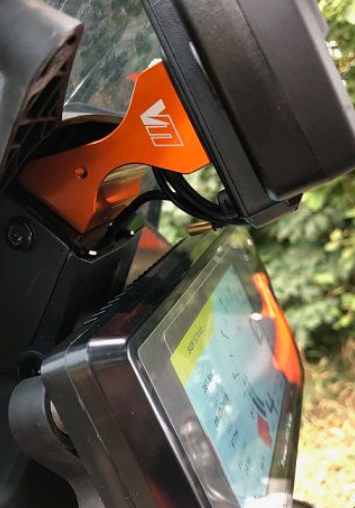
SW-Motech

SW Motech now have a mount available, priced around €60. This projects very far back, over the TFT screen, the device can be mounted directly to the mount. The mount is removable, it clips to its base. It seems this setup wobbles a bit (video)
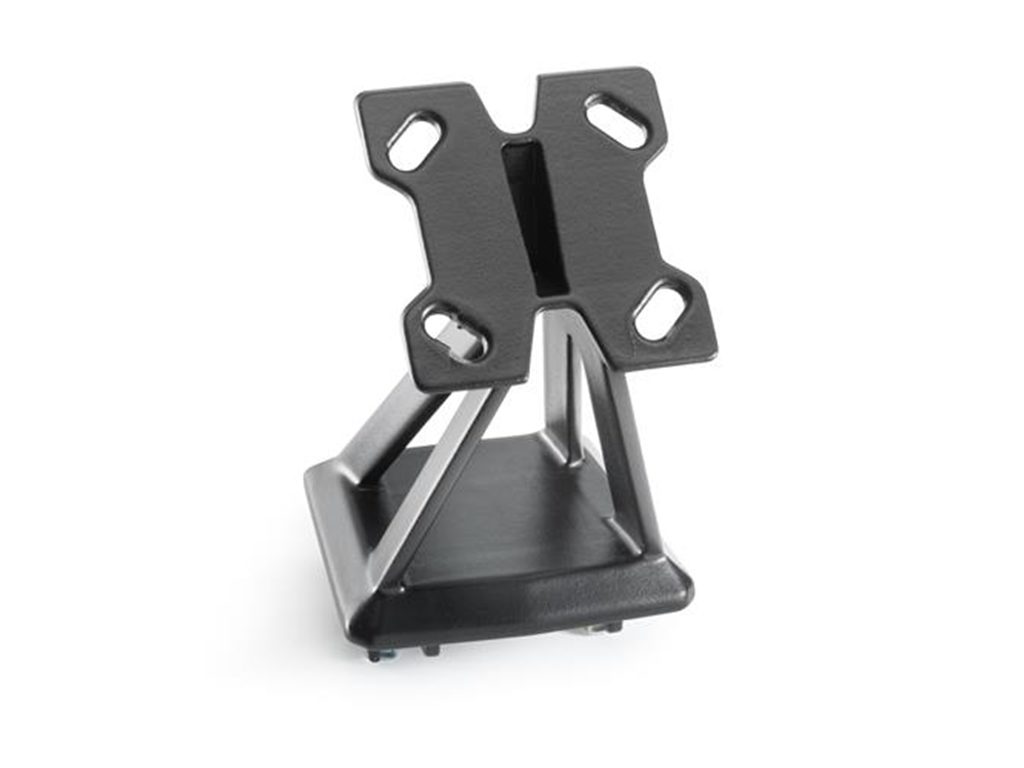
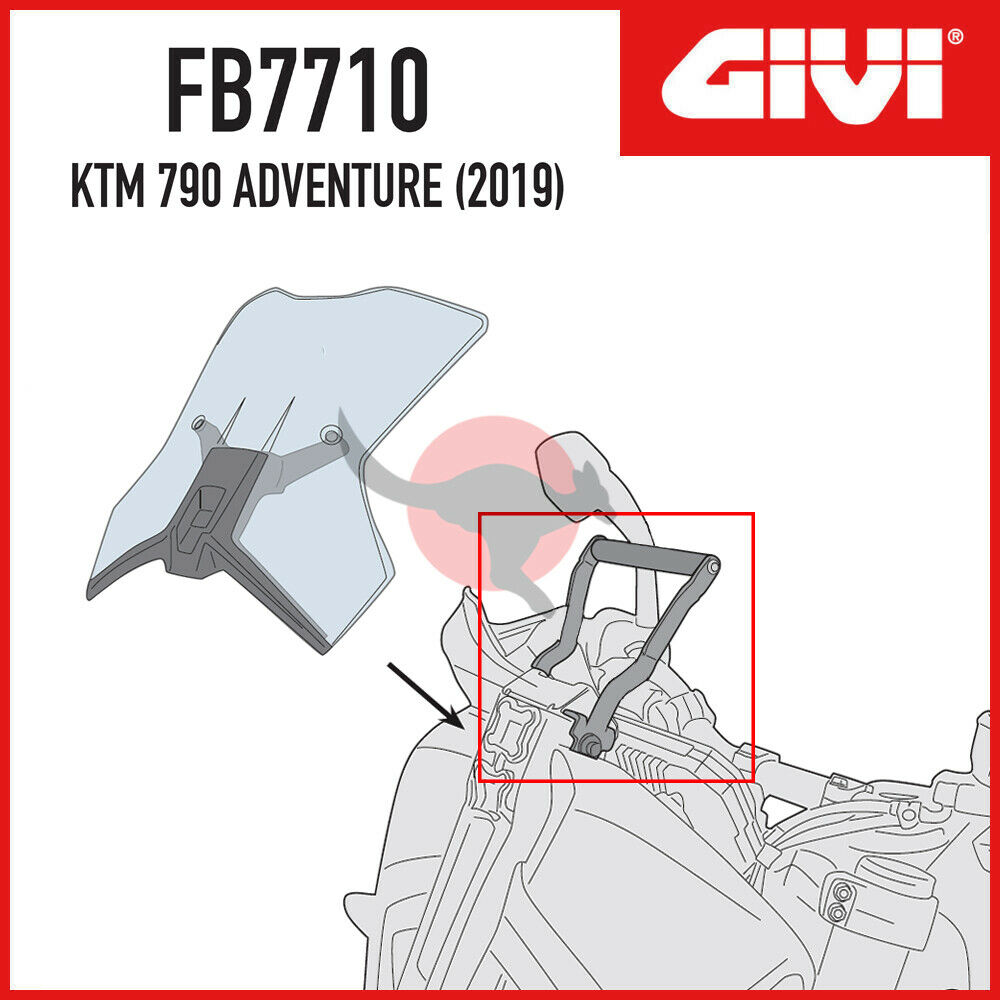
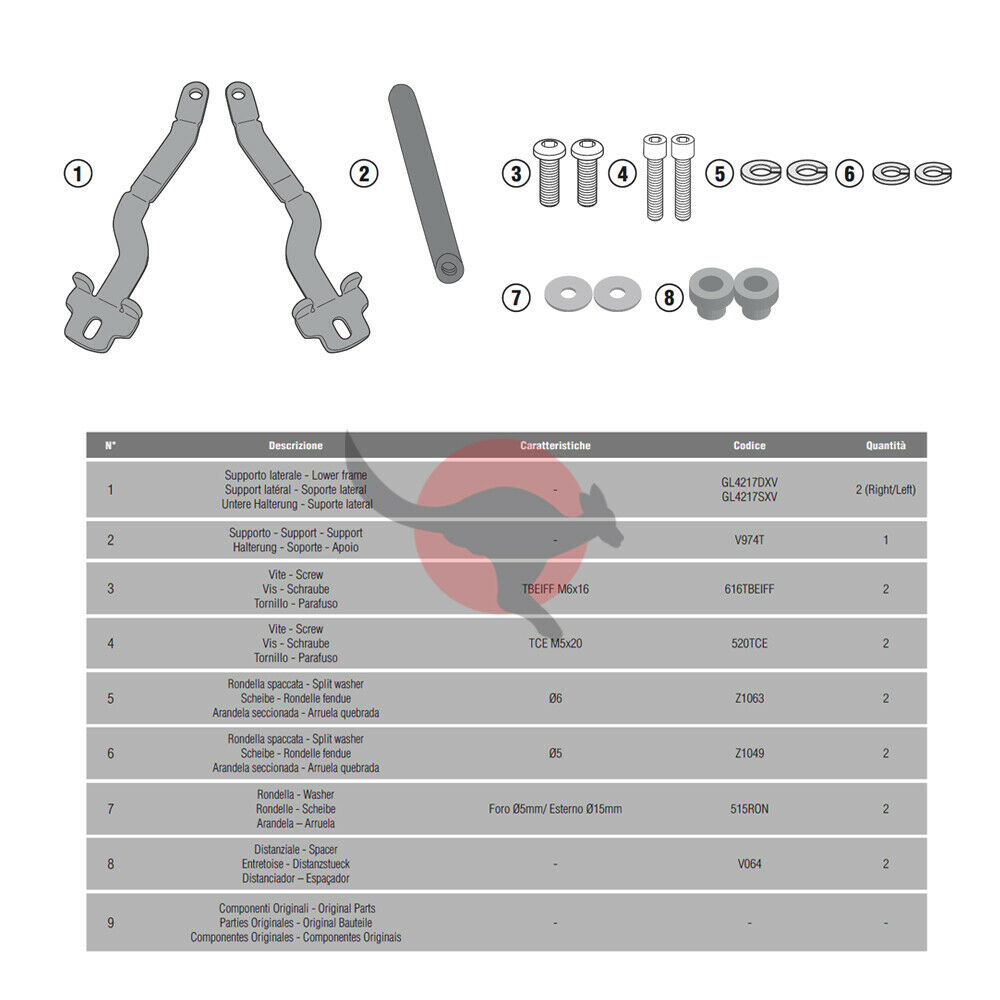
SWMotech mount

Givi

Givi has released a mount specific to the 790, putting a bar high up to fasten your devices to. Reference Givi FB 7710. There is no images in the product description on Givi’s page, but an ebay auction showed a couple of pics of the manual, see below. Around €40. This mount will only function if the original plastic part is present as it uses it to lock itself.

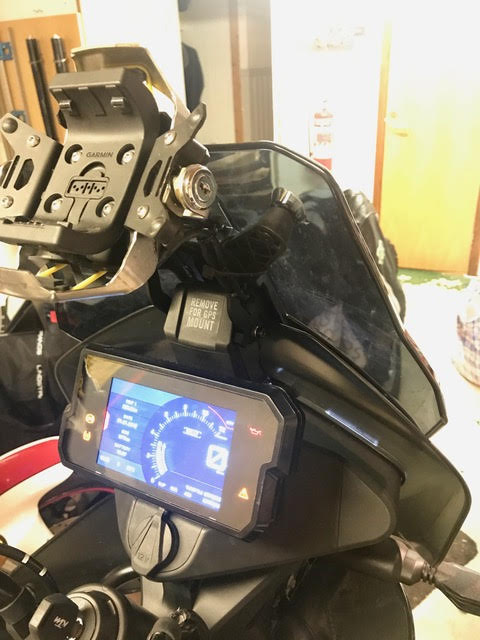
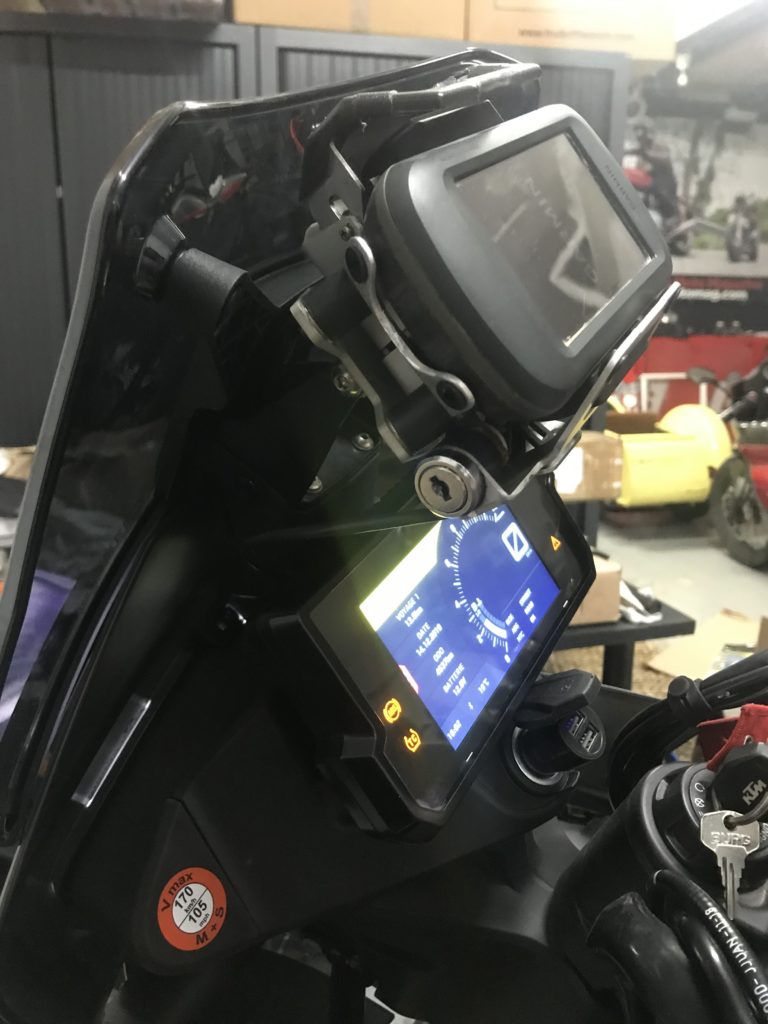
The Givi mount is hackable, one reader (hi Anders!) installed it rotated 180º to get closer to the screen (and higher), and reports that it can be drilled to eventually change the position of the bar. See pic below.

Givi FB7710 mounted at 180º with a lockable mount for a GPSMAP 276cx

Lion

Similar to the GIV mount, but narrower, and with possible adjustment of the bar, the company Lion in Colombia offers a simple metallic mount that grips the original plastic for stability. $60
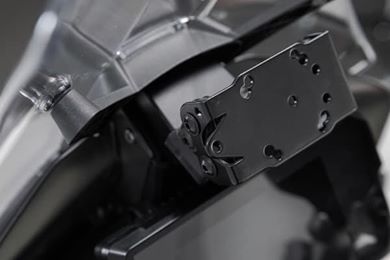
Touratech mount

Touratech is making a simple mount ($75), putting a bar up on the dashboard to attach anything, but with a metallic base. In the picture it is mounted with a lockable Garmin mount.

Viejos Pistones

They have two different models, a simple wedge one (€25) and another articulated (€65).

Handlebar mounts

There is a handlebar mount from the 790 Duke that fits (P/n  64112992033, €40). But this put the GPS very low at a place where it is hard to read while riding.

KTM handlebar mount
Markus Ramirez/Facebook

On the handlebar there are other alternatives like the MotoMinded Stoutmount which is offering a little bit more flexibility in GPS placement.

Rally Pack

This adds Rally Mode to the base S model. Your KTM dealer need to install a software enabler (P/n 63500910000) at about £175. Rally mode is only software and included on the ‘R’.

There was an interesting chart passed on by KTM to the journalists during the bike presentation in Morocco about what setting to use in which conditions. It was published in this article and reproduced below.

Traction control recommended settings

See also the article about riding modes, explaining in details all the modes available with and without the Rally pack.

Heated grips

Original Grip removal

On the left side roll the factory rubber grip back: on the bottom there is a set screw. Remove and slide the entire grip off.

For the right side remove the throttle tube system from the bike by unscrewing the 2 Phillips screws from the throttle sensor/housing. The throttle tube slides right off.

KTM easy to install option

(P/n is 64112964044), cost about £145, with a separate non-integrated controller.

The big advantage of the KTM part is the simplicity of the throttle install as the grips are designed to fit in place of the existing parts: reverse the steps for removing the grips to install the heated one, it’s dead easy.

The rest of the install is simple: install the controller, wire it to the ACC power in the headlight.

Despite the easy install the result of installing the KTM grips is not well integrated with the bike, with an ugly controller which resets every time the ignition is turned off. .

Third party install

You might want to consider non KTM options, and go with the grips you like. Below you can find the steps to install the Koso Apollo grips (also known as Tecnoglobe Gold) which have an integrated controller in the left grip. Make sure to get the 130mm version.

There is discussion as the exact diameter of those grips once installed. The two installs used to write this FAQ entry disagree on the sizes! One states that they are slimmer than the original grip. The other claims that the same grips are thicker! I guess more that one versions of those grips exists, hence the discrepancy?

Below are the pics I took on my bike, on usage I don’t feel the difference.:

On the left side, install is dead easy: slide the new grip in place, you’re done.

The difficulty of the install is all due to the throttle tube. It is not available as a separate part from KTM, so you need to figure a way to unglue the rubber from the plastic tube and then file it clean. There is however a third party aluminium throttle tube available (Also at Slavens Racing, $80). But it needs some filing done to grind the first ridge so the 130mm slid all the way to the end.

G2 aluminium replacement throttle tube

To retrieve the throttle tube one way is to scrap the grip off with a blade. It’s long and dirty, but works:

The brute force scrapping option

Another option is to make a slit on the whole length of the rubber and skin it off, way cleaner, but it’s difficult not to score the plastic tube.

Once the rubber is removed from the tube, you need to remove the tabs there with a blade as they will prevent the new rubber to slip in place. They are pointed out in this picture. Note the inner hump next to the sensor housing: removing it makes for a snug fit without a strange gap between the housing and the grip. The fit is PERFECT but you only have one try since the fit is so tight.

Once the tube is clean, put the new grips on. On the throttle side pay attention to the position of the wire on the throttle tube as to not limit the range of motion. Check 3 times before doing it.

The rest is easier, just decide if you want to connect to the accessory connector under the seat or in the headlight. The headlight is closer, and easy to open despite the numerous screws. Make sure to fix all the wires and the small controller to not be in the way of any moving parts.

See the entry on power to locate the accessory connectors.

Many thanks to Rickard Holtemark and Warren Vincent Granier on FB for the reports and the photos in this article.

Cruise control

Cruise control is an option on the S and the R, and standard on the Rally (some early rally had the Cruise control incorrectly disabled).

Enabler code (p/n 63500980000) costs about £220, plus a replacement for the four-way combination switch which includes cruise switch (p/n 76011270100), about £78. Total about £300.

Something to be aware off: the cruise control is connected to the traction control: if the road you’re on triggers the traction control to intervene the cruise control will automatically disconnect. This is probably a safety feature, but might catch you by surprise if you go over a bump.

Order the combination switch early, stocks are low and the part may take more than a month to arrive. Your dealer can activate CC without the switch and you can install it later, but in that case  there is a simple procedure to follow to sync the hardware switch with the software (thanks to CrazyCole on advrider.com for the details):

  • Switch on the ignition
    • Cruise control system indicator lamp flashes
  • Press the newly installed control tip switch to the left for 3 seconds
  • Press the cruise control tip switch to position RES/+ for 3 seconds
  • Press the cruise control tip switch to position SET/- for 3 seconds
  • Turn the throttle grip forward past the neutral position (Force it forward a bit, there is a switch on the throttle to disconnect the cruise control if you forcefully decelerate)
    • The cruise control system indicator lamp should go out
  • Switch off the ignition

There is a video showing how to install the combination switch and enabling it.

If the cruise control doesn’t work, and never engage, there could be multiple reasons:

  • The most likely one is that the bikes thinks your brakes are on (see the faulty ABS sensor article)
  • It is possible that the clutch switch, under the clutch lever, is either disconnected, moved or broken (Can happen when installing aftermarket levers for example). See the specific paragraph about it in the brake/clutch control article.
  • Also, if for some reason your yellow warning light is on on your dashboard, it causes the CC to stop working (For example some “engine management upgrades” make you unplug sensors, and the CC will not work with those unplugged).

Quickshift+

S and R are pre-equipped. Your dealer need to install a software enabler (P/n 61600940000) about £334. This option is standard on the Rally (Some early rally models had QuickShift+ disabled, they need a software update)

Once installed and enabled there is a new menu available to turn it on and off. The quickshifter works for both upshift (cutting power) and downshift (blipping the throttle).

Quickshift+ menu

If the menu is not present, quickshift+ is not installed. You can still change gear up without using the clutch if you do it at the right RPM, but this is not a true shifter that is cutting the power. Some (rare) bikes have the quickshift active but nothing in the menu: it is a factory misconfiguration and the feature may disappear when the dealer updates the software on the bike…

If the quick shifter stops working, check the clutch lever microswitch, the quick shifter is intentionally turned off is the clutch is disengaged, and the only thing carrying this information is this small microswitch (In addition have a dysfunctional switch there is potentially dangerous as it will not prevent starting the bike in gear). See this thread.

Power connectors

Where to find them

There are two pairs of connectors you can use to power accessories pulling less than 10Amp (GPS, Heated grips…) either switched by ignition or permanent. Those are documented in the manual.

Two are under the seat, and an easy reach.

Two are inside the headlight housing and are more complicated to access:

  • The manual points to the access hatch under the headlight housing where those should be accessible. On the R accessing the hatch requires removing the mud guard. But unfortunately, on most bikes the wires are tucked in in a way that make this access impractical.
  • Another way to access is to dismantle the headlight, this takes a lot of screws, a lot of swearing, and solving the enigma of how to remove the metal bar. When you’ve done it once it become easier, and there are great how-to to get you there. The beginning of this video is a step by step removal of the complete front headlight; for the purpose of accessing the power plug there is too much dismantling, but it covers all the bases.
  • Another alternative reported to work is to access the wires by disconnecting the headlight from the frame, 6 screws, pull it. Putting everything back in is the larger challenge, having another set of hand to help is not superfluous.

In all cases use loctite on all screws on reassembly.

What to connect and where

Most of the accessories for a motorcycle should be connected to switched power to prevent emptying the battery. But both accessory plugs are sharing one 10 amps fuse. In general this is plenty enough: a GPS will pull less than an amp, heated grips around 3 amps. But if you are accessory happy and you plug a GPS, heated grips, heated vest, comfort heated seats, heated boot soles and a set of high power lights you may end up pulling too much energy for the poor fuse.

A simple way to double the available power is to add a relay to pull from the permanent power, which is on another 10 amp fuse. An explanation on how to do this is available on snafu.org.

« Previous Page